Tag: Beginner Guides

What Order To Watch Attack On Titan Complete...
Navigating the expansive world of Attack on Titan can feel overwhelming for both newcomers and returning fans due to its multiple TV seasons, Original Video Animations, and special episodes. Understanding the proper viewing sequence is essential for capturing every twist, character detail, and lore revelation without encountering major plot spoilers out of order.
Release Order vs Chronological Order
Watching Attack on Titan in broadcast release order is widely considered the best approach for first-time viewers. This sequence ensures that suspense and narrative reveals unfold exactly as the creators intended. Following the main release pathway prevents accidental spoilers that might occur if side stories are watched too early.
A chronological watch order weaves extra side stories directly between specific episodes of the main series based on when events occur timeline-wise. While this approach offers deeper background context for secondary characters, it can interrupt the pacing of major story arcs. Most fans prefer completing the primary narrative first before diving into chronological rewatches.
Main TV Series Viewing Sequence
The core storyline begins with Season 1, which introduces Eren Yeager and the fight for humanity's survival inside the walls. Following the first season, viewers should proceed directly into Season 2 to continue the immediate plot momentum. Season 3 is split into two distinct parts, both of which expand significantly on the political and world-building mysteries.
The final entry of the main series, Season 4, is divided into multiple parts along with special extended finale episodes. Watching these final segments in numerical sequence completes Eren's overarching story arc without missing critical resolution beats. Sticking strictly to the numbered television seasons guarantees a smooth and cohesive narrative flow.
Incorporating OVAs and Side Stories
Original Video Animations add valuable background depth to key figures like Levi Ackerman and Annie Leonhart. Important OVAs like No Regrets and Ilse's Notebook are best viewed right after completing Season 1 or during early Season 2. These side episodes enrich emotional connections to characters without stalling the main conflict.
Other side content, including the Lost Girls series, offers unique perspectives on major characters during quiet moments in the timeline. While these episodes are technically optional, they provide meaningful context that dedicated fans will thoroughly enjoy. Integrating them after Season 2 keeps the pacing balanced and engaging.
Tips for an Optimal Viewing Experience
To maintain peak storytelling tension, avoid watching summary recap movies during your initial playthrough of the series. Summary feature films condense multi-episode arcs and frequently omit nuanced character development necessary for later seasons. Experiencing the full episodic releases provides the most rewarding emotional payoff.
Additionally, pay close attention to mid-episode information cards and post-credits scenes throughout every season. Many crucial world-building details and teaser scenes are hidden after the closing credits conclude. Taking your time with each season guarantees you experience the complete story as a unified masterpiece.

Sound Of Night Part 2 Quest Details And...
Exploring the lush environments of Avatar: Frontiers of Pandora presents players with numerous engaging side activities that flesh out Na'vi culture. Among these, the quest line surrounding nocturnal sounds offers an intriguing mystery for players resting at clan camps. Completing the Sound of Night Part 2 side quest allows players to assist their allies while securing valuable Clan Favor and skill points.
Starting the Quest Line
To begin this mission, players must first complete the preceding quest and speak with Ley'Taw at the River's Run camp. After a full day passes, a new unsettling noise begins troubling the camp's children at night. Passing time at the local campfire allows you to advance the day until nightfall, triggering the next step in the quest chain.
Finding the Hidden Cave Entrance
Once night falls, head east from the camp toward the rock formations located near River's Embrace. Map markers can sometimes be misleading by pointing to the top of the formation, but the objective lies below at ground level. Look toward the southern base of the central rock to spot glowing Stromsky Bamboo stalks marking the entrance to a hidden cave system.
Navigating the Cavern and Locating Nilngan
Step inside the cave and follow the linear pathway as it winds deeper underground. Take the side paths when encountering dead ends until you reach an inner cavern chamber. Here, you will discover the elder Nilngan practicing on a Kame'tire instrument, which turns out to be the source of the mysterious sound scaring the camp.
Completing the Quest and Claiming Rewards
After speaking with Nilngan and learning about his intentions, exit the cavern and fast travel back to River's Run. Report your findings directly to Ley'Taw to reassure the clan and finalize the side quest. Completing this task grants a skill point and boosts your standing through earned Clan Favor.

Legend Of Zelda Ocarina Of Time Logo History...
The release of The Legend of Zelda: Ocarina of Time in 1998 marked a monumental shift for Nintendo as the franchise transitioned into full 3D environments. Along with revolutionary gameplay mechanics, the game introduced a refreshed visual identity centered around its iconic logo design. Exploring the history and aesthetic structure of this logo offers valuable insight into how Nintendo communicated a new era of fantasy adventure to millions of players worldwide.
Transitioning the Franchise Visual Identity to 3D
When Nintendo developed Ocarina of Time for the Nintendo 64, the design team needed a logo that reflected the increased hardware power and cinematic scope. Previous 2D entries had established foundational elements like bold lettering and sharp triangular serifs. To signal the leap into polygon graphics, artists enhanced the classic wordmark with dimensional depth and metallic textures.
The resulting design featured 3D-influenced gold lettering with distinct beveled edges that gave the title a tangible, heroic feel. Bright highlights paired with subtle shadow gradients allowed the central text to pop against dark box art backgrounds. This visual shift mirrored the evolution of Link himself as he stepped into a sprawling three-dimensional Hyrule .
Key Symbolism and Structural Composition
At the center of the logo composition sits the iconic name of Princess Zelda, anchored by an oversized letter Z that commands immediate attention. Incorporated within or alongside the main wordmark are core franchise motifs, including the golden Triforce emblem representing Power, Wisdom, and Courage. These geometric shapes reinforce the deep narrative themes woven into the storyline.
To differentiate this entry from past releases, a specialized subtitle layer was created specifically for the Ocarina of Time identifier. The subtitle text features custom typography paired with subtle mystical accents, such as the musical ocarina motif. This balanced layout ensured brand recognition while highlighting the central gameplay mechanics involving time travel and music.
Impact and Legacy on Future Zelda Logos
The visual framework established by the Ocarina of Time logo set a high standard for subsequent entries in the series. Its refined use of beveling, rich gold hues, and integrated story elements became the blueprint for games like Majora's Mask and Twilight Princess. Fans and graphic designers frequently cite this logo iteration as one of the most memorable branding achievements in gaming history.
Although modern titles such as Breath of the Wild have adopted flatter, distressed branding styles to match open-world survival themes, the influence of the 1998 logo remains undeniable. It stands as a timeless bridge between retro pixel art roots and modern cinematic gaming. Understanding its evolution highlights how thoughtful graphic design can elevate an entire video game franchise.

How to Tame a Karkinos Complete Taming Guide
Taming a Karkinos in ARK: Survival Evolved requires careful planning and precise positioning due to its unique knockout mechanics. Unlike standard creatures that succumb to tranquillizer darts, this giant crustacean can only be rendered unconscious through heavy blunt impacts targeted directly at its main body. Preparing the proper equipment beforehand ensures a successful encounter without risking the creature's life.
Constructing an Effective Trapping Enclosure
Securing the Karkinos in a sturdy trap is the most crucial first step before attempting a knockout. Building a structure using stone dinosaur gateways or pillars prevents the creature from jumping away or attacking nearby survivors. Placing a elevated platform nearby gives players the clear vantage point needed to aim heavy artillery accurately.
Luring the wild beast into your structure requires patience and careful movement to avoid its grabbing attacks. Once locked inside, the creature will thrash around, so using durable materials like stone prevents quick escapes. Having a safe elevated position allows you to focus purely on aiming your shots.
Targeting and Knockout Techniques
To apply torpor successfully, survivors must hit the central shell of the creature rather than its legs or claws. Striking its limbs deals massive physical damage without increasing torpor, which can easily kill high-level targets. Utilizing a catapult turret offers better precision and control compared to cannons.
Timing each shot carefully when the target pauses ensures maximum efficiency and minimal wasted ammunition. If the creature takes too much damage, dragging wild animal carcasses to it allows it to heal before resuming. Maintaining steady fire directly on the torso guarantees a smooth knockout.
Feeding and Maintaining Taming Efficiency
Once the creature is unconscious, placing Exceptional Kibble into its inventory provides the fastest taming rate and highest stat bonuses. Alternatively, spoiled meat serves as an effective budget option for players without access to top-tier kibble. Monitoring its torpor level is essential since it can drain surprisingly fast compared to other large wild beasts.
Protecting the unconscious crustacean from wild predators ensures that its taming effectiveness remains intact. Once fully tamed, equipping it with a saddle unlocks a versatile mount capable of leaping massive distances and dual-wielding smaller creatures. Strategic taming methods ultimately turn a terrifying opponent into one of the most useful companions in the game.

Fortnite Chapter 1 Season 5 Major Changes Features...
Fortnite Chapter 1 Season 5 remains one of the most transformative updates in the history of Epic Games' battle royale sensation. Launched in July 2018 under the tagline "Worlds Collide," this season introduced massive map changes, brand-new transportation mechanics, and dimensional rifts that redefined how matches were played. The sudden collision of real-world history and fantasy elements created an unforgettable era for millions of active players worldwide.
The Arrival of the Desert Biome and Paradise Palms
One of the most significant alterations in Season 5 was the complete overhaul of the southeastern section of the battle royale island. The green hills of Moisty Mire were replaced by a sprawling, sun-drenched desert biome that brought fresh visual variety to the map. At the heart of this region sat Paradise Palms, a modern resort city filled with multi-story buildings and high-tier loot opportunities.
Alongside Paradise Palms, the update introduced unique points of interest such as the Viking Village perched atop a snowy waterfall and Lazy Links, an sprawling luxury golf course. These diverse locations dramatically altered player rotation strategies and increased the density of early-game skirmishes across the island. The introduction of distinct biomes established a visual standard that future seasons would continue to build upon.
Rifts and All-Terrain Karts Revolutionize Mobility
Season 5 fundamentally shifted how players navigated the map by introducing dimensional Rifts scattered across key landmarks. Stepping into a Rift teleported players high into the sky, allowing them to redeploy their gliders and travel long distances quickly. This mechanic made escaping the shrinking storm eye much easier while opening up aggressive aerial rotations onto unsuspecting enemy squads.
To complement airborne mobility, Epic Games introduced the All-Terrain Kart, commonly known as the ATK. As the game's second official vehicle, the four-person cart allowed entire squads to travel together while drifting around corners to boost speed. Passengers in the back seats could even bounce in sync to propel the vehicle over tall obstacles, introducing a fun cooperative layer to traversal.
The Spray Meta and Weaponry Balancing Shifts
Gameplay in Season 5 saw a drastic meta shift toward rapid-fire automatic weapons and away from double-shotgun strategies. The addition of the Compact SMG and Suppressed Submachine Gun rewarded relentless close-quarters pressure, prompting fierce debates within the competitive community. Players had to adapt quickly as defensive structures were shredded faster than in previous updates.
Despite the controversy surrounding the new combat balance, this period encouraged players to experiment with novel loadouts and tactical utility. Grenade Launchers, Heavy Shotguns, and Hunting Rifles remained popular choices for tactical variety. Adapting to these rapid balance adjustments became a core skill for anyone striving to earn victory royales consistently.
Unforgettable Battle Pass and Cosmic Lore Events
The Season 5 Battle Pass offered a memorable collection of cosmetics anchored by progressive outfits like Drift and Ragnarok. Drift's style unlocked new layers, glowing coats, and Kitsune masks as players accumulated experience points throughout the season. This progression system provided strong motivation for players to complete weekly challenges and log in daily.
Narrative progression also reached new heights with the appearance of a mysterious purple cube, affectionately dubbed "Kevin" by the gaming community. Rolling across the map over several weeks, the cube left glowing runes in its wake before eventually dissolving into Loot Lake. This dynamic, real-time world event captivated players and set the stage for Fortnite's ongoing story events.

Abstract Daddy Silent Hill 2 Boss Encounter And...
The Abstract Daddy in Silent Hill 2 remains one of the most psychological and disturbing boss encounters in horror gaming history. Originating as a manifest representation of deep personal trauma, this creature forces players to confront heavy narrative themes within the nightmare world of Silent Hill. Understanding its origin and thematic significance provides crucial insight into the game's complex character dynamics.
The Narrative Origin of Abstract Daddy
In Silent Hill 2, the Abstract Daddy manifests primarily as a projection of Angela Orosco's traumatic past and severe domestic abuse. The creature's unsettling appearance resembles two figures covered in a sheet atop a bed frame, symbolizing the suffering she endured. While James Sunderland engages the monster in combat, he is witnessing a bleed-over of Angela's personal hell into his own journey.
The encounter takes place deep within the Labyrinth after James hears distress cries from Angela. Defeating the creature grants brief relief to Angela, though her emotional scars remain unresolved throughout the story. This interaction highlights how the town of Silent Hill manifests distinct subconscious horrors for each troubled soul that enters it.
Visual Design and Psychological Symbolism
Creature designer Masahiro Ito crafted the Abstract Daddy to evoke themes of restraint, distortion, and physical oppression. The bed-like structure and moving pistons in the surrounding environment reflect the terrifying nature of Angela's childhood environment. The blurred features of the creature emphasize how trauma distorts memory and perception into monstrous forms.
Interestingly, James perceives the creature through his own mental filter, connecting the bed imagery to his memories of his bedridden wife Mary. This duality demonstrates how the town blends the psyches of different visitors into shared nightmares. The visual design serves a dual purpose by advancing both Angela's backstory and James's internal guilt.
Tactics for the Boss Encounter
Fighting the Abstract Daddy requires careful movement and weapon management due to the narrow room layout. Players should maintain distance using high-powered firearms such as the shotgun or rifle to prevent being grabbed by the boss. Utilizing quick repositioning tactics helps avoid taking heavy damage in tight quarters.
In modern remakes and classic playthroughs alike, staying calm and watching attack telegraphs ensures a swift victory. Once defeated, a tragic cutscene unfolds between James and Angela that highlights the dark reality of her suffering. The fight remains a pivotal moment that bridges action gameplay with profound emotional storytelling.
Lasting Impact on Psychological Horror
The Abstract Daddy stands out as a prime example of environmental storytelling where gameplay mechanics serve narrative themes. Rather than offering a standard monster fight, the developer used the encounter to explore heavy adult topics with maturity and horror. Decades after its original debut, this boss sequence continues to be studied by narrative designers and gaming enthusiasts.
Ultimately, the story behind Abstract Daddy showcases the unique narrative strength of the Silent Hill franchise. By weaving character trauma directly into boss design, the game delivers an unforgettable experience that resonates far beyond traditional jump scares.

Call Of Duty MW Cheats And Hidden Gameplay...
The Call of Duty Modern Warfare series has captivated millions of players with its intense tactical combat and cinematic campaign storytelling. Across various iterations of the franchise, developers have embedded hidden console codes, secret easter eggs, and subtle mechanics that drastically alter gameplay. Uncovering these hidden features provides players with a fresh perspective on classic missions and modern multiplayer arenas.
Classic Campaign Codes and Developer Cheats
In original releases of the Modern Warfare series, players could unlock legitimate cheat modifiers by collecting hidden intel laptops throughout the single-player campaign. These modifiers allowed players to activate fun gameplay tweaks, such as infinite ammunition, slow-motion combat, and enemy head transformations. Utilizing these built-in options offered a rewarding way to replay story missions without risking account penalties.
Unlike third-party software, developer-sanctioned cheat options were built directly into the game menu as extra rewards for thorough exploration. Players who took the time to search every corner of the battlefield were granted powerful abilities that made replaying campaigns infinitely entertaining. These traditional secrets established a precedent for hidden rewards across subsequent franchise entries.
Hidden Easter Eggs and Map Secrets
Modern Warfare maps are filled with intricate interactive elements and pop-culture references that require precise actions to trigger. From hidden functional arcade cabinets to complex button sequences that launch secret mini-games, developers love rewarding curious players. Discovering these environmental secrets adds a layer of depth that extends far beyond standard team deathmatch encounters.
Certain multiplayer maps even contain hidden sound cues, secret locked rooms, and easter eggs tied to overarching lore narratives. Coordinating with teammates to solve these map-wide puzzles often requires patience and specific loadout setups. These community discoveries keep classic environments feeling fresh and engaging long after their official launch.
Advanced Gameplay Mechanics and Movement Tips
Mastering Call of Duty Modern Warfare often relies on understanding hidden mechanics that are not explicitly detailed in standard tutorials. Techniques like tactical sprint management, slide canceling, and sound cue optimization give dedicated combatants a distinct edge in firefights. Learning how environmental audio interacts with specific perks helps players anticipate enemy movements accurately.
Understanding weapon recoil patterns and attachment synergisms allows players to craft optimal loadouts tailored to specific playstyles. Mastering line-of-sight angles and power positions on competitive maps turns basic gunplay into a strategic battle of wits. Players seeking additional edge-of-seat excitement often explore competitive titles and gaming guides to refine their combat tactics.
Ethical Gaming and Anti-Cheat Awareness
While offline single-player codes are celebrated for entertainment, using unauthorized third-party cheats in multiplayer modes ruins the experience for everyone. Modern iterations of the game rely on kernel-level anti-cheat software designed to detect and penalize malicious software usage permanently. Fair competition ensures that victory remains satisfying and earned through practice and genuine skill.
Focusing on legitimate gameplay improvement, tactical positioning, and team communication yields long-term success without risking account bans. Utilizing built-in settings, adjusting controller sensitivity, and studying map layouts remain the most effective methods for dominating the opposition. Emphasizing fair play protects the integrity of the gaming community while fostering real personal improvement.

Resident Evil 2 PS5 Upgrade Options And Enhanced...
Capcom's acclaimed remake of Resident Evil 2 received a dedicated PlayStation 5 release, bringing enhanced hardware capabilities to the survival horror masterpiece. Players who previously owned the PlayStation 4 version can transition to the current-generation release through specific upgrade paths. Understanding these performance improvements and upgrade procedures ensures players get the best possible experience when revisiting Raccoon City.
How to Access the PS5 Upgrade Path
Owners of the digital or physical PS4 versions are eligible for a free digital upgrade to the PS5 edition. Disk owners must insert their original PS4 game disc into a PS5 console with a disc drive to download the upgraded version. Digital owners can simply locate the game in their PlayStation Network library and claim the current-gen download at no additional cost.
It is important to note that save files and trophy progression can be transferred directly to the new version. The main menu includes a dedicated cloud feature designed to migrate existing save data seamlessly. This feature allows returning players to retain all unlocked weapons, extra costumes, and completed campaign progress without starting over.
Visual Enhancements and Graphic Modes
The PS5 edition introduces two primary visual modes designed to leverage the console's modern graphics architecture. High Frame Rate mode prioritizes smoother motion, targeting consistent performance during intense gameplay sequences. Alternatively, Ray Tracing mode enhances ambient lighting, reflections, and shadows throughout the dark corridors of the police station.
These graphical options provide noticeably sharper image quality and dynamic visual effects compared to previous console generations. Shadows appear deeper, while puddle reflections and metallic surfaces react realistically to light sources. Players can easily toggle between these visual settings in the game's options menu based on personal preference.
DualSense Wireless Controller Integration
One of the most impactful additions to the PS5 version is the utilization of DualSense haptic feedback and adaptive triggers. The adaptive triggers simulate the unique resistance of different firearms, offering tactile feedback when firing handguns, shotguns, or the grenade launcher. This physical sensation creates a more immersive combat feel during desperate encounters with infected enemies.
Haptic feedback also subtle delivers environmental rumble sensations, such as footsteps overhead or heavy rain hitting exterior surfaces. These directional vibrations enhance spatial awareness and tension during atmospheric exploration. Combined with updated 3D audio features, the controller mechanics significantly elevate the overall immersion.
Faster Loading Times and Quality of Life Updates
The integration of the PS5's high-speed solid-state drive drastically reduces load times across the entire campaign. Transitioning between rooms, reloading checkpoints after death, and booting into the main menu occur almost instantaneously. This performance boost eliminates long waiting screens, keeping the pacing tense and continuous.
Overall, the current-gen release provides a refined way to experience one of the modern era's top survival horror games. The combination of visual upgrades, immersive controller features, and rapid loading times delivers substantial value for both new players and returning veterans. Experiencing the atmospheric streets of Raccoon City with modern console features makes the upgrade well worth exploring.

Resident Evil 2 PS5 Upgrade Options And Enhanced...
Capcom's acclaimed remake of Resident Evil 2 received a dedicated PlayStation 5 release, bringing enhanced hardware capabilities to the survival horror masterpiece. Players who previously owned the PlayStation 4 version can transition to the current-generation release through specific upgrade paths. Understanding these performance improvements and upgrade procedures ensures players get the best possible experience when revisiting Raccoon City.
How to Access the PS5 Upgrade Path
Owners of the digital or physical PS4 versions are eligible for a free digital upgrade to the PS5 edition. Disk owners must insert their original PS4 game disc into a PS5 console with a disc drive to download the upgraded version. Digital owners can simply locate the game in their PlayStation Network library and claim the current-gen download at no additional cost.
It is important to note that save files and trophy progression can be transferred directly to the new version. The main menu includes a dedicated cloud feature designed to migrate existing save data seamlessly. This feature allows returning players to retain all unlocked weapons, extra costumes, and completed campaign progress without starting over.
Visual Enhancements and Graphic Modes
The PS5 edition introduces two primary visual modes designed to leverage the console's modern graphics architecture. High Frame Rate mode prioritizes smoother motion, targeting consistent performance during intense gameplay sequences. Alternatively, Ray Tracing mode enhances ambient lighting, reflections, and shadows throughout the dark corridors of the police station.
These graphical options provide noticeably sharper image quality and dynamic visual effects compared to previous console generations. Shadows appear deeper, while puddle reflections and metallic surfaces react realistically to light sources. Players can easily toggle between these visual settings in the game's options menu based on personal preference.
DualSense Wireless Controller Integration
One of the most impactful additions to the PS5 version is the utilization of DualSense haptic feedback and adaptive triggers. The adaptive triggers simulate the unique resistance of different firearms, offering tactile feedback when firing handguns, shotguns, or the grenade launcher. This physical sensation creates a more immersive combat feel during desperate encounters with infected enemies.
Haptic feedback also subtle delivers environmental rumble sensations, such as footsteps overhead or heavy rain hitting exterior surfaces. These directional vibrations enhance spatial awareness and tension during atmospheric exploration. Combined with updated 3D audio features, the controller mechanics significantly elevate the overall immersion.
Faster Loading Times and Quality of Life Updates
The integration of the PS5's high-speed solid-state drive drastically reduces load times across the entire campaign. Transitioning between rooms, reloading checkpoints after death, and booting into the main menu occur almost instantaneously. This performance boost eliminates long waiting screens, keeping the pacing tense and continuous.
Overall, the current-gen release provides a refined way to experience one of the modern era's top survival horror games. The combination of visual upgrades, immersive controller features, and rapid loading times delivers substantial value for both new players and returning veterans. Experiencing the atmospheric streets of Raccoon City with modern console features makes the upgrade well worth exploring.

How To Get To Stars Office RE2 Location...
Navigating the sprawling hallway layout of the Raccoon City Police Department in Resident Evil 2 can be challenging for both new and returning players. Among the most vital destinations on the second floor is the S.T.A.R.S. Office, which contains key story items and powerful arsenal upgrades. Knowing the exact route and access requirements will save you valuable time and resources during your playthrough.
Navigating to the S.T.A.R.S. Office Location
The S.T.A.R.S. Office is situated on the second floor of the police station's west wing. To reach this room from the Main Hall, head through the West Office on the first floor and take the stairs up to the second floor. From there, navigate through the Shower Room corridor to enter the main hallway where the office door is located.
Players should exercise caution when approaching this corridor, as environmental hazards and roaming enemies often patrol the surrounding area. Moving quietly helps prevent unnecessary encounters with dangerous creatures like Lickers that lurk near the ceiling. Once you reach the doorway, you can freely enter to begin exploring the office interior.
Essential Items Found Inside the Office
Upon entering the S.T.A.R.S. Office, players will find a wealth of useful survival supplies scattered across various desks and rooms. Key pickups include First Aid Sprays, ammo, and high-grade gunpowder for crafting specialized ammunition. You will also discover an internal memo detailing safe combinations for other police station lockers.
In addition to tactical supplies, the office holds a critical story item required for main progression. Located in the smaller private office, players can retrieve the Battery needed to assemble the Detonator. Gathering this item allows you to clear barricaded doors elsewhere in the facility.
Unlocking the S.T.A.R.S. Armory Weapons
Inside the office sits a locked weapons armory secured behind an electronic terminal. To grant computer authorization, you must locate the Red Book from the Library and combine it with the statue arm in the Art Room to obtain a Red Gem. This gem opens the Bejeweled Box found in the Interrogation Room, granting you the S.T.A.R.S. Badge.
By examining the badge in your inventory, you can retract a hidden switch on the back to convert it into a USB Dongle Key. Inserting this USB drive into the office computer terminal unlocks the armory door instantly. Depending on whether you play as Leon or Claire, you will receive the Lightning Hawk Magnum or the MQ 11 Submachine Gun.
Tips for Safe Exploration and Backtracking
Because the police station layout constantly changes as story events unfold, planning your visits efficiently is essential. It is advisable to clear out surrounding hallway threats before solving the armory puzzle. This ensures you can retreat safely once high-tier weapons are secured in your inventory.
Keep in mind that returning to the S.T.A.R.S. Office later in the campaign may trigger encounters with pursuing threats like Tyrant. Utilizing safe rooms and planning direct navigation routes keeps your item management efficient. By taking full advantage of the office's resources, you greatly improve your survival odds across Raccoon City.

Super Mario 3D World 6 3 Stamp Location...
Finding every hidden item in Super Mario 3D World can be a challenging journey for completionists aiming to unlock every secret. Among the trickiest collectibles in the game is the stamp in World 6-3, known as Hands-On Hall. Because it requires a specific power-up and a keen eye for subtle environmental clues, many players end up running past it without realizing where it lies.
Required Items for the World 6 3 Stamp
Before attempting to grab the stamp in Hands-On Hall, players must make sure they acquire the Propeller Box item early in the level. This special headpiece allows your character to launch high into the air with a sudden burst of momentum. Without the extra height provided by this item, reaching the hidden platform where the stamp is kept becomes impossible.
Navigating to the Hidden Pathway
Proceed through the Japanese-style mansion until you reach the section where you collect five key coins to activate the Warp Box. After stepping through the Warp Box while wearing the Propeller Box, you will enter a corridor featuring Spikes throwing spiked logs down a wooden walkway. Instead of rushing forward, pay close attention to the open railing on the side facing toward the screen.
Reaching the Roof Platform
Walk toward the front screen edge near the Spikes to step out onto the exterior roof area. Once outside, use the Propeller Box to fly directly upward onto the higher roof structure. The stamp rests right on top of this elevated platform waiting to be collected.
Tips for Successful Stamp Collection
Take care when maneuvering around the Spikes, as taking damage will cause you to lose the Propeller Box needed for the ascension. If you accidentally lose the item, you will need to restart the stage or head back to grab another one. Taking a cautious approach ensures you claim the collectible smoothly on your first attempt.

Video Lottery Near Me Within 1 Mi and...
Finding a video lottery terminal within a one-mile radius can save time while offering local entertainment options. Many neighborhoods feature licensed venues like taverns, dedicated gaming lounges, and convenience centers that host authorized video lottery machines. Understanding how to locate these nearby spots ensures a convenient and safe gaming experience right in your immediate area.
Using Digital Location Tools and Mapping Services
GPS-enabled mapping applications on your mobile device provide the fastest way to pinpoint gaming venues nearby. By searching for video lottery terminals or licensed gaming parlors, map filters can narrow down results specifically to venues within a single mile. Checking recent user ratings and photos helps confirm whether a location currently offers operational machines.
Official state lottery websites frequently maintain searchable retailer directories designed for public access. Entering your current postal code or address into these portals generates a verified list of sanctioned establishments. Relying on state databases guarantees that the venues listed adhere to local legal standards and consumer safety regulations.
Identifying Common Types of Local VLT Venues
Video lottery terminals are commonly installed in adult-only establishments such as neighborhood bars, pubs, and sports lounges. These social settings offer a relaxed environment where patrons can enjoy casual gaming alongside food and beverage services. Identifying nearby hospitality venues is often the easiest step toward finding terminals within a short walking distance.
In addition to traditional taverns, dedicated video lottery parlors and fraternal organizations often host state-regulated gaming machines. Some travelers also explore digital gaming alternatives like m88 to understand how different entertainment formats operate online. However, physical establishments remain the primary choice for individuals seeking immediate, local terminal access.
Checking Licensing Standards and Local Regulations
Before visiting a nearby terminal location, verifying that the venue displays an official state gaming license is important. Authorized operators must post clear regulatory certificates near their gaming floor to ensure fair machine payout standards. Checking these credentials protects consumers and ensures that the facility operates fully within local laws.
Different municipalities enforce specific operating hours, age verification rules, and entry requirements for video lottery areas. Most state frameworks strictly require patrons to be at least 21 years old to enter designated gaming spaces. Reviewing venue guidelines in advance prevents unexpected entry issues upon arrival.
Tips for Planning a Safe and Convenient Visit
Selecting a location within one mile makes walking or taking a short ride simple and efficient. Prioritizing well-lit venues located in active commercial districts enhances personal safety during evening visits. Planning your trip around off-peak hours can also secure a quieter atmosphere with better terminal availability.
Setting clear personal limits before visiting any gaming venue encourages a responsible and positive experience. Managing your time and budget safeguards entertainment value while preventing unnecessary financial stress. Utilizing local location tools wisely helps you discover reliable, nearby venues for enjoyable recreation.

How To Play Infinity Blade Guide
The iconic action RPG Infinity Blade defined a generation of touch-based mobile combat with its smooth gesture mechanics and intense swordplay. Learning the core loop and combat timing is essential for any player looking to conquer the fortress and defeat powerful Titan opponents. This comprehensive guide breaks down the essential mechanics to help you master every battle and progress through bloodlines efficiently.
Mastering Combat Mechanics and Defensive Moves
Combat relies heavily on precise timing through dodging, blocking, and parrying enemy attacks. Dodging allows you to evade incoming swings, while blocking absorbs damage at the cost of shield stamina. Parrying requires you to swipe your blade directly against the trajectory of an enemy's strike to stun them.
Timing your parries correctly creates an opening for devastating combo attacks against tough bosses. Practicing these defensive maneuvers early prevents unnecessary health loss in harder encounters. Utilizing super attacks and magic spells can also provide crucial relief during difficult multi-phase fights.
Managing Gear and Resource Grinding
Progress in the game is closely tied to equipping better weapons, armor, shields, and magic rings. Earning experience points allows your character to level up and gain stat points to allocate toward health, attack, or magic. Saving gold to purchase high-tier equipment like the titular blade significantly speeds up your combat efficiency.
Players often utilize specific castle routes to maximize gold drops and experience gain. Exploring every courtyard corner and opening hidden chests yields extra resources between battles. Repeatedly completing bloodlines builds your overall power, ensuring your lineage grows stronger with each attempt.
Understanding the Bloodline System
When your hero falls in combat against the God King, your progress carries over to the next generation. Each new bloodline retains all previously earned equipment, gold, and mastered stat points. This recursive loop ensures that defeat is simply another step toward permanent progression.
Navigating through successive bloodlines allows you to face increasingly challenging foes with advanced stats. Mastering enemy attack patterns across generations makes future runs far smoother. Over time, your accumulated experience and upgraded gear will give you the decisive edge needed to triumph.

How To Link Twitch To PS5 Account Connection...
Broadcasting your gameplay directly from the PlayStation 5 to Twitch is one of the easiest ways to share your favorite gaming moments with friends and global audiences. Setting up this connection allows you to go live instantly without requiring expensive external capture cards or complex desktop streaming software. Understanding how to sync your accounts properly ensures a stable connection and smooth streaming sessions every time you hit the broadcast button.
Accessing the PS5 System Settings
To begin the connection process, navigate to the main home screen of your PlayStation 5 console. Click on the gear icon located in the top right corner to open the system settings menu. Scroll down through the menu options until you find Users and Accounts, then select it to view your account management options.
Within the Users and Accounts menu, locate the Linked Services tab on the left side of your screen. This section displays all third-party platforms that can be integrated with your PlayStation Network account. Select Twitch from the list of available services to initiate the authorization prompt.
Completing the Twitch Activation Process
Once you select Twitch, your console will display a unique web link alongside an activation code and a QR code. You can quickly scan the QR code using your smartphone camera or open a web browser on a computer to enter the web address. Enter the alphanumeric code displayed on your TV screen into the activation field.
If you are not already logged into your Twitch account on your mobile device or browser, you will be asked to sign in. Review the permission request that grants PlayStation permission to interact with your streaming channel, then tap Authorize. Once confirmed, a notification will appear on your console confirming that your accounts are successfully linked.
Starting Your First Broadcast From the Control Center
With your accounts officially paired, launching a live stream is fast and straightforward. Simply boot up the game you want to stream and press the Create button on your DualSense wireless controller. Choose the Broadcast icon from the bottom overlay menu to open your stream customization panel.
Before taking your broadcast public, you can adjust vital settings such as video resolution, overlay positioning, and party voice chat inclusion. Give your live stream an engaging title so potential viewers know what gameplay content to expect. When everything is configured to your satisfaction, select Go Live to start streaming immediately to your Twitch channel.
Managing and Troubleshooting Your Connection
If you ever experience streaming delays or connection errors, verifying your account status in the Linked Services menu is a helpful first step. Ensuring that two-factor authentication is enabled on your Twitch account can also resolve common broadcasting issues on modern consoles.
If you ever need to transfer your console access to a new channel or resolve persistent sync glitches, unlinking your profile takes only a few button presses. Returning to the Linked Services tab allows you to remove the connection safely at any time. Reauthorizing the connection afterwards often solves minor software bugs and restores normal broadcasting functionality.

Dreamlight Poached Basil Butter Sturgeon Recipe And Cooking...
Preparing high-star meals in Disney Dreamlight Valley is one of the best ways to restore energy, build friendships with villagers, and earn extra Star Coins. Among the rich seafood offerings in the game, the Poached Basil-Butter Sturgeon stands out as a sophisticated four-star entree. Understanding how to gather the necessary ingredients and cook this dish efficiently will help players progress smoothly through their magical valley adventures.
Required Ingredients for Poached Basil Butter Sturgeon
To cook this gourmet seafood meal, players must combine four specific ingredients at any cooking station. The primary component is a White Sturgeon, which provides the base for this savory fish dish. You will also need one fresh Basil, one juicy Lemon, and a stick of rich Butter.
Using exact ingredients ensures you do not accidentally create a lower-tier meal or a completely different recipe. Keep in mind that every cooking attempt also requires one piece of Coal Ore to light the stove. Stocking up on these basic items beforehand makes mass cooking much easier during long play sessions.
Where to Find and Gather Every Ingredient
Finding the White Sturgeon requires heading to the chilly waters of the Frosted Heights biome. Players must target gold fishing ripples in the rivers to catch this rare and elusive fish. Patience is essential, as gold spots spawn less frequently than white or blue fishing locations.
For the seasonings and dairy, head over to different areas across the valley. Fresh Basil grows wild across the ground in the Peaceful Meadow biome and can be harvested easily without tools. Lemons grow directly on wild trees located in the Forest of Valor and the Glade of Trust. Finally, Butter must be purchased directly from the pantry shelf inside Chez Remy using Star Coins.
How to Cook and Serve the Recipe
Once all four items are gathered, head to any active stove or cooking station. Interact with the cooking pot, then drag the White Sturgeon, Basil, Lemon, and Butter into the vessel. Confirm the selection to spend one Coal Ore and instantly prepare the meal.
This four-star creation offers excellent benefits whether consumed or sold to Goofy's stall. Consuming the dish provides a high boost to your character's energy meter, which triggers the beneficial movement speed bonus. Gifting this meal to villagers who request it as their daily favorite will significantly boost your friendship levels.
Tips for Efficient Fishing and Farming
To maximize your ingredient harvesting, bring along a companion assigned to the Fishing role when hunting White Sturgeon. A high-level fishing companion gives you a strong chance of catching extra fish from a single gold ripple. This approach saves considerable time and helps you accumulate extra stock quickly.
Additionally, check your inventory routinely to ensure you always have enough coal for cooking. Mining rock spots around any biome will supply plenty of coal alongside valuable gems. With a solid supply line of fish and herbs, cooking high-quality entrees will become a fast and routine task.

Palworld How To Heal Pals Health Recovery Methods...
Keeping your companions healthy in Palworld is essential for surviving tough boss battles and maintaining high efficiency at your base. When your Pals take heavy damage or suffer from debilitating injuries, knowing how to quickly restore their health keeps your team combat-ready. This guide explores the most effective health recovery methods and practical tips to ensure your Pals stay in peak condition.
Utilizing the Palbox and Base Resting Methods
One of the simplest and most reliable ways to heal injured Pals is by using the Palbox at your base. Placing damaged or incapacitated Pals into the Palbox initiates a gradual regeneration process over time. While this passive resting method takes longer than active items, it requires zero resources and safely restores HP.
Additionally, constructing comfortable Pal Beds around your base allows working Pals to rest when their health or sanity drops. Ensuring that your base has enough beds and accessible food troughs helps prevent health decay. A well-maintained base environment ensures your team recovers steadily between active exploration trips.
Feeding and Medical Supplies for Fast Recovery
Feeding your Pals regularly plays a vital role in maintaining their health indicators during long journeys. Equipping Feed Bags automatically distributes food to your active party members whenever their hunger levels drop. Proper nourishment prevents health depletion and allows passive HP regeneration while stored in Pal Spheres.
For direct healing and curing specific ailments, players can utilize medical supplies and consumable potions. Crafting or purchasing items from Wandering Merchants allows you to treat injuries like fractures or sprains effectively. Keeping a stock of healing items in your inventory ensures your party stays operational during dangerous encounters.
Leveraging Healer Pals and Active Skills
Incorporate specialized healer Pals into your active team lineup to gain powerful support capabilities during active combat. Certain creatures like Petalia or Teafant feature Partner Skills designed to restore HP directly to you or your party members. Activating these partner abilities offers vital burst healing when taking heavy damage in high-stakes fights.
Enhancing your healer Pals through the Pal Essence Condenser further increases the strength of their healing skills. Higher skill ranks provide stronger HP recovery boosts, turning these companions into indispensable support units for endgame content. Pairing active healing skills with protective gear maximizes overall survivability across the Palpagos Islands.
Strategic Battle Tips to Prevent Pal Injuries
Preventing severe injuries before they occur is always the best long-term strategy for managing your team's health. Recall your Pal into its Pal Sphere immediately if its health drops to critically low levels during a battle. Swapping between different team members prevents individual Pals from fainting and avoids long recovery wait times at base.
Monitoring enemy attack patterns and utilizing elemental advantages also reduces the damage your Pals take during encounters. Equipping high-quality armor and personal shields helps absorb incoming hits intended for your companions. By taking proactive combat measures, you can keep your companions active without wasting valuable medical resources.

Resident Evil 4 Mural Puzzle Solution And Walkthrough
Navigating the perilous lake region in Chapter 4 of Resident Evil 4 brings players face-to-face with the intricate Mural Cave puzzle. This central mechanism acts as a gatekeeper, requiring Leon Kennedy to locate two crucial stone key items before he can claim the Church Insignia. Understanding how to read the environmental clues around the cavern network makes solving this challenge straightforward and efficient.
Finding the Mural Cave and Understanding the Objective
After surviving the intense Del Lago boss encounter, players dock their boat and enter the shadowy passageways of the Mural Cave. Inside, a stone shrine features two large open hands flanking a central locked pedestal. A nearby wall painting depicts the surrounding lake and highlights two key locations: the Small Cave Shrine and the Large Cave Shrine.
To unlock the shrine, players must travel to both locations by boat to retrieve the Blasphemer's Head and the Apostate's Head. Each shrine houses a stone door sealed by a symbol-based combination lock. Observing the yellow painted markings on the surrounding rock walls reveals the necessary combinations.
Solving the Small Cave Shrine Symbol Puzzle
Located on the northeastern side of the lake, the Small Cave Shrine presents a compact area with yellow graffiti scattered across walls and structures. Players must align their view from specific angles to see how split markings merge into complete symbols. These environmental clues correspond directly to the buttons on the shrine's pedestal device.
The three correct inputs are the three squiggly lines, the bird-like figure, and the connected chain structure. Pressing these buttons in any sequence opens the sealed chamber containing the Blasphemer's Head key item. Players can also grab additional valuable loot before returning to their boat.
Conquering the Large Cave Shrine Challenge
The Large Cave Shrine sits to the south and features aggressive enemy encounters alongside its puzzle mechanism. Players should clear out the hostile Ganados first to inspect the cavern layout safely. Yellow symbols are painted across pillars, rock faces, and upper ledges throughout the multi-level chamber.
Inputting the two adjacent chain links, the curved lines facing each other, and the tower-like symbol unlocks the door. Retrieving the Apostate's Head from the altar allows Leon to complete the second half of the requirement. With both stone heads in hand, players can navigate back across the water.
Claiming the Church Insignia and Moving Forward
Returning to the Mural Cave, place both stone heads onto the open hands on either side of the shrine. The central pedestal will open automatically, granting Leon the coveted Church Insignia needed to unlock the church doors. This unlocks passage to the next main story objective while concluding Chapter 4's primary lake investigation.
Before rushing off to the church, take time to explore remaining lake landmarks or complete side requests. Collecting extra treasures and upgrading weapons ensures Leon is fully prepared for upcoming boss fights.

BG3 Vision Of The Absolute How To Find...
Baldur's Gate 3 is filled with hidden secrets and craftable equipment that players can easily pass by during their initial journey through Faerûn. Among these early-game treasures, the Vision of the Absolute stands out as a unique spear requiring players to combine two distinct broken components found across Act 1. Understanding where to collect these pieces and how to utilize the weapon effectively gives party members a powerful tactical edge in combat.
Locating the Shaft and Head of the Broken Spear
To craft this uncommon weapon, players must locate the Shaft of a Broken Spear and the Head of a Broken Spear scattered in the wilderness. The shaft is held by Edowin, a dying True Soul cultist found lying on the ground near the Forest road west of the Emerald Grove. Players can loot his body after interacting with him to claim the first component.
The spearhead requires a venture into the nearby Owlbear Nest located in the same forest region. Defeating the Owlbear mother or searching her nest allows players to retrieve the head of the broken weapon. Once both pieces are in your inventory, open the right-click context menu on either item and select the option to combine them directly into the completed spear.
Combat Passives and Special Weapon Effects
The Vision of the Absolute offers distinct passives that set it apart from standard spears encountered early in the campaign. Its primary feature, Absolute Power, grants a chance to inflict Blindness on a target whenever you strike them, provided they fail a Dexterity saving throw. This soft crowd-control effect causes affected enemies to suffer disadvantage on their attack rolls while granting your party advantage against them.
Additionally, the spear features the Blindspot passive, which deals an additional 2d6 Piercing damage to targets with multiple sets of eyes. This effect is specifically potent against spider-type enemies, watchers, and beholders such as the Spectator. Utilizing this weapon in encounters against arachnids significantly accelerates combat speed and efficiency.
Best Character Builds and Strategic Tips
Because the spear possesses the Versatile and Thrown properties, it fits exceptionally well onto frontline martial classes. Barbarians and Fighters can wield it alongside a shield for added defense or combine it with two-handed stats for increased direct damage. Classes like Paladins can also benefit from applying smites alongside the potential blinding status.
When planning your early party equipment, matching the Vision of the Absolute with characters who deal consistent melee hits maximizes the chance to proc its blinding passive. Combining its blind application with advantage-based mechanics lets your damage dealers dominate crucial Act 1 boss encounters. Ensuring you do not miss either component in the Forest guarantees access to this craftable spear early in your adventure.

Can Pokemon Evolve In Pokemon Quest Evolution Mechanics...
In the blocky world of Pokemon Quest, players often wonder if their favorite pocket monsters can transform into stronger forms. The short answer is yes, Pokemon can evolve in Pokemon Quest, but the mechanics differ slightly from traditional core series games. Understanding how evolution functions in this action-packed spin-off helps you build a more powerful team to tackle challenging expeditions.
How Leveling Up Triggers Evolution
Most Pokemon in Pokemon Quest evolve simply by gaining experience and leveling up during expeditions or training. The level required for evolution typically matches the level requirements found in the mainline Pokemon games. Once a creature hits its target level, it will automatically transform into its next stage at the end of a stage or after training.
If you obtain a Pokemon that is already past its normal evolution level from cooking, it will not evolve instantly. Instead, you must level it up at least once more to trigger the evolution process. However, keep in mind that a Pokemon at level 100 cannot gain any more levels, meaning it will remain in its current form forever.
Special Evolution Requirements for Unique Pokemon
Not all creatures evolve strictly through standard leveling numbers. Eevee is the most famous exception in Pokemon Quest, as its evolution depends on the stats granted by equipped Power Stones when it reaches level 36. Equipping more Attack Stones turns Eevee into Flareon, while equipping more HP Stones results in Vaporeon.
If you prefer to balance Eevee's HP and Attack stats equally, or equip no stones at all, it will evolve into Jolteon instead. Pokemon that normally rely on evolution stones or trading in main games generally evolve through leveling in this title. This streamlined design keeps gameplay focused on cooking and expedition preparation.
Using Everstones to Prevent Unwanted Evolutions
Sometimes you may prefer to keep a Pokemon in its unevolved form to maintain specific stat bonuses or bingo traits. You can easily stop a Pokemon from evolving by toggling the Everstone option on its summary screen. Turning this feature on prevents the transformation even after the required level is reached.
Keeping a Pokemon unevolved can also make move training easier before transitioning to a higher evolution tier. If you decide later that you want the evolved form, simply toggle the Everstone off and gain another level. Managing evolutions carefully ensures your team maintains optimal stats and abilities throughout your adventure.

Cabin Crew Simulator Roblox Codes And Available Rewards
Cabin Crew Simulator on Roblox provides players with an engaging aviation experience where they manage flights, assist passengers, and maintain order in the sky. To enhance this journey, developers regularly release promotional codes that grant free in-game currency known as Skybux. Using these freebies helps virtual flight attendants unlock customization options faster without relying solely on standard flight rewards.
Understanding Cabin Crew Simulator Codes and Rewards
In Cabin Crew Simulator, redeemable codes serve as special promotional tools distributed by the developers through social channels. Most active codes reward players directly with varying amounts of Skybux, ranging from smaller amounts to several thousand per code. These bonus funds can immediately be spent on stylish uniforms, essential flight cosmetics, or new aircraft upgrades to elevate your overall flight performance.
Keeping track of valid codes ensures that you never miss out on limited-time event rewards or milestone celebration bonuses. Active codes such as 1776, 400m, runway, concorde, and frost provide instant boosts to your account balance upon redemption. Regularly checking official community updates helps players collect every active reward before it officially expires.
How to Successfully Redeem Active Codes in Game
Redeeming your reward codes in Cabin Crew Simulator requires just a few simple steps inside the game interface. After launching the experience on Roblox, look for the dedicated gift icon located on the left side of your screen. Clicking this icon opens up a text input field where you can enter active phrases to claim your free Skybux instantly.
To prevent redemption errors, make sure to enter each code exactly as displayed, paying close attention to capital letters and numbers. If a code fails to work, double-check whether it has expired or if it was previously claimed on your account. Joining the developer's official Roblox group can also resolve access issues for exclusive community rewards.
Maximizing Your Earned Skybux for Upgrades
Acquiring extra Skybux through codes allows players to invest in high-tier gear and expanded airline services early on. By combining promotional rewards with regular flight earnings, you can efficiently upgrade cabin amenities and passenger comfort features. Smart financial management in-game translates to higher customer satisfaction scores and faster progression overall.
Using free rewards wisely ensures your flight crew stands out with unique customization items while maintaining optimal airline operations. Staying updated on new code releases gives dedicated players a continuous competitive edge in building the ultimate Roblox airline empire.

Fish in a Box Riddle: Solving the Puzzle...
Brain teasers and wordplay challenges have long captivated puzzle enthusiasts, and the fish in a box riddle remains a classic example of lateral thinking. The riddle presents a simple scenario involving a fish placed inside a container, prompting solver efforts to locate the creature after a series of actions. Unraveling this puzzle requires paying close attention to phrasing, logical assumptions, and word arrangement rather than taking every statement at face value.
Understanding the Premise of the Riddle
The core setup of the riddle typically outlines putting a fish inside a box, securing it, and then asking where the fish is currently located. Many people immediately jump to physical or practical answers, assuming the fish is inside the container, underwater, or in a specific location. However, traditional riddles often rely on semantic tricks where the question itself contains the answer.
Analyzing the Linguistic Clues
Solving tricky brain teasers demands a careful breakdown of the vocabulary and grammar used in the prompt. In many variations of this puzzle, the solution plays on literal interpretation versus clever word placement. By examining how the sentences are structured, solvers can identify whether the prompt is testing pure spatial logic or playing with double meanings.
Common Pitfalls and Alternative Solutions
A frequent mistake when attempting this riddle is overcomplicating the physical scenario. People often worry about whether the fish can survive without water or if the box was thrown into a lake, which distracts from the core trick. Depending on the specific version being told, the true answer might simply point to the word "Where" itself or highlight that the fish is exactly where it was placed.
Why Lateral Thinking Puzzles Stay Popular
Word puzzles like this one remain popular because they challenge our cognitive habits and encourage creative problem-solving. They remind us to double-check our assumptions before jumping to conclusion-driven answers. Engaging with these mental exercises regularly helps sharpen critical thinking skills and provides entertaining discussions among friends.

Fish in a Box Riddle: Solving the Puzzle...
Brain teasers and wordplay challenges have long captivated puzzle enthusiasts, and the fish in a box riddle remains a classic example of lateral thinking. The riddle presents a simple scenario involving a fish placed inside a container, prompting solver efforts to locate the creature after a series of actions. Unraveling this puzzle requires paying close attention to phrasing, logical assumptions, and word arrangement rather than taking every statement at face value.
Understanding the Premise of the Riddle
The core setup of the riddle typically outlines putting a fish inside a box, securing it, and then asking where the fish is currently located. Many people immediately jump to physical or practical answers, assuming the fish is inside the container, underwater, or in a specific location. However, traditional riddles often rely on semantic tricks where the question itself contains the answer.
Analyzing the Linguistic Clues
Solving tricky brain teasers demands a careful breakdown of the vocabulary and grammar used in the prompt. In many variations of this puzzle, the solution plays on literal interpretation versus clever word placement. By examining how the sentences are structured, solvers can identify whether the prompt is testing pure spatial logic or playing with double meanings.
Common Pitfalls and Alternative Solutions
A frequent mistake when attempting this riddle is overcomplicating the physical scenario. People often worry about whether the fish can survive without water or if the box was thrown into a lake, which distracts from the core trick. Depending on the specific version being told, the true answer might simply point to the word "Where" itself or highlight that the fish is exactly where it was placed.
Why Lateral Thinking Puzzles Stay Popular
Word puzzles like this one remain popular because they challenge our cognitive habits and encourage creative problem-solving. They remind us to double-check our assumptions before jumping to conclusion-driven answers. Engaging with these mental exercises regularly helps sharpen critical thinking skills and provides entertaining discussions among friends.

Can You Appear Offline on Switch: Privacy and...
Gaming on the Nintendo Switch is often a social experience, but there are times when players prefer to enjoy their favorite titles without interruption. Whether you want to focus on a single-player story or simply avoid party invites, managing your online presence is essential. Nintendo provides clear privacy settings that allow you to customize who can see your activity and online status.
How to Change Your Online Status to Offline
To appear offline to your friends, navigate to your user profile page from the Nintendo Switch home menu. Select User Settings, then scroll down to find the Friend Functions menu options. From there, locate the setting for Display Online Status and set it to No One or Best Friends only.
Adjusting this option ensures that your friends will not receive notifications when you sign in or launch a game. It allows you to maintain total privacy while still enjoying full access to online features like multiplayer matchmaking and the Nintendo eShop.
Managing Play Activity and Game Visibility
Hiding your online status prevents live notifications, but your friends might still view your recent play activity on your profile. Within the same User Settings menu, you can control who is allowed to see your play history. Setting Display Play History to No One hides all information regarding the games you have recently played and total hours logged.
Clearing your play activity history is another useful step if you prefer a completely clean profile page. You can wipe this data at any time through the privacy menu without losing saved game progress or digital purchases.
Best Practices for Nintendo Switch Privacy
Taking control of your digital footprint on the Switch goes beyond simply turning off your active online status indicator. You can also block specific users or limit who can send you friend requests to prevent unwanted interactions altogether. Reviewing your privacy settings periodically helps ensure your gaming session remains peaceful and completely undisturbed.
Understanding In-Game Online Features
It is important to note that hiding your status via system settings may not affect third-party games with separate social systems. Certain titles with dedicated cross-platform accounts might still show you as active to friends within their specific in-game menus. Always check individual game settings if you want complete privacy across every platform you play on.

Best Xbox One Horror Games: Scariest Games Worth...
The Xbox One generation hosted an incredible library of dark, atmospheric, and genuinely terrifying survival horror titles. From claustrophobic corridors in space stations to relentless psychological torment in abandoned estates, players have experienced incredible interactive scares. Choosing the right title depends on whether you prefer combat-heavy survival mechanics or slow-burn narrative tension that keeps you guessing at every turn.
Atmospheric Survival and Claustrophobic Environments
Titles like Alien Isolation deliver an unmatched sense of dread by trapping players in narrow, metallic corridors with an unpredictable alien predator. The advanced artificial intelligence ensures that no two encounters feel identical, forcing constant adaptation and cautious movement. Navigating these shadowy environments requires careful resource management and strategic patience to stay alive.
Similarly, Dead Space Remastered revitalizes classic sci-fi horror with modernized visual fidelity and enhanced audio design. Players explore the desolate USG Ishimura while managing limited ammunition and dismembering terrifying mutated threats. The oppressive soundscape creates constant tension, making even silent rooms feel deeply unsettling.
Psychological Horror and Unsettling Storytelling
Games that focus on psychological decay often leave a more lasting impression than traditional monster encounters. Layers of Fear explores the mind of an obsessed painter whose surrounding reality shifts dynamically as you wander through his changing mansion. This subgenre relies heavily on environmental storytelling and clever perspective tricks rather than direct physical confrontation.
Hellblade Senua's Sacrifice masterfully blends brutal combat with an intimate exploration of severe psychosis and mythic tragedy. Utilizing binaural audio, the game envelops players in a chorus of voices that advise, mock, and warn the protagonist throughout her dark quest. Experiencing this journey with headphones provides one of the most immersive psychological horror atmospheres available on console.
Visceral First-Person Terror and Survival
Resident Evil 7 Biohazard completely revitalized the legendary franchise by shifting the camera perspective to a claustrophobic first-person viewpoint. Exploring the decaying Baker plantation forces players to confront gruesome horrors while carefully tracking scarce handguns, herbs, and defensive supplies. The intimate framing makes every corner turn a terrifying gamble for survival.
Outlast challenges players to survive a chaotic asylum equipped with nothing more than a camcorder with limited night-vision battery life. Without any weapon mechanics to defend yourself, hiding under beds and inside lockers becomes your sole means of staying alive. The vulnerability established by this gameplay style creates relentless panic during intense enemy pursuits.
Cooperative Scares and Replayable Horror
For players who prefer facing nightmares alongside friends, modern cooperative horror games offer a unique dynamic blend of comedy and intense tension. Dead by Daylight pairs four survivors against an iconic killer in high-stakes tactical matches where team coordination determines survival. The constantly evolving roster of licensed horror legends keeps each match fresh and unpredictable.
Phasmophobia brings paranormal investigation to life, asking players to identify ghostly entities using specialized equipment before things turn deadly. Communication is essential as voice detection mechanics allow the spectral entities to react directly to player chatter. Working together under pressure creates memorable gaming moments that balance strategy with genuine frights.

How To Link PS4 Controller To PS4 And...
Connecting a DualShock 4 controller to a PlayStation 4 console is typically a seamless process, but occasional sync issues can leave players feeling frustrated. Whether you are setting up a brand-new gamepad, returning after using it on a PC, or troubleshooting a lost connection, establishing a solid link requires just a few straightforward steps. Understanding the proper pairing techniques ensures your hardware communicates properly without constant signal drops.
Initial Setup Using a USB Cable
The most reliable method to link a controller to your console for the first time is through a standard micro-USB cable. Connect the smaller end of the cable directly into the controller and plug the full-sized USB end into one of the front ports on the PlayStation 4. Once connected, press the PS button in the center of the gamepad to trigger the synchronization process.
If the connection succeeds, the light bar on the top of the controller will turn a solid color representing your assigned user slot. Using a cable that supports both power delivery and data transfer is essential, as charging-only cables will fail to establish a system link. Once the light bar stays illuminated, you can safely unplug the cable and enjoy wireless gameplay.
Pairing a Wireless Controller via Bluetooth Settings
If you prefer to pair a secondary controller wirelessly, you can utilize the system settings menu using an already connected gamepad. Navigate to the Settings menu on your dashboard, select Devices, and then open the Bluetooth Devices section. This screen displays all current peripheral hardware paired with your system.
On the unlinked controller, press and hold the PS button and the Share button simultaneously for about five seconds until the light bar begins double-blinking rapidly. Your console will detect the broadcasting signal and display the gamepad in the Bluetooth menu. Simply select the new device using your primary controller to finalize the pairing process without needing a physical tether.
Troubleshooting Signal Drops and Unresponsive Hardware
When a previously linked wireless controller suddenly stops connecting, underlying software glitches or interference are often responsible. Physical obstructions, nearby Wi-Fi routers, and competing Bluetooth signals can interrupt communication between the console and your gamepad. Clearing these obstacles or moving closer to the system can immediately restore connection stability.
If the controller remains unresponsive, resetting its internal memory often resolves lingering firmware conflicts. Locate the tiny pinhole reset button on the back of the DualShock 4 near the L2 shoulder button. Insert a straightened paperclip into the hole, hold the button down for five seconds, and then attempt to resync the controller using a USB data cable.
Maintaining Optimal Wireless Controller Performance
Keeping your controller operating smoothly requires regular battery maintenance and timely system updates. Low battery levels frequently cause input lag, random disconnections, or failure to register button presses during active gaming sessions. Allowing your gamepad to charge fully before long play periods helps prevent unexpected synchronization drops.
Additionally, keeping your system software up to date ensures the console maintains full compatibility with all official accessories. If persistent connectivity issues continue despite testing multiple cables and resetting the hardware, testing the controller on a different console can help determine if the internal Bluetooth antenna requires professional repair.

Guess Who I Saw Today FNV Quest Guide...
Navigating the sun-scorched wastes of Fallout: New Vegas often leads players to unexpected pockets of civilization, each harboring its own deep-seated problems. In the secluded community of Jacobstown, a peaceful refuge for mutant kind, a subtle crisis threatens to destroy their fragile tranquility from within. The side quest titled Guess Who I Saw Today tasks the Courier with investigating a bizarre affliction affecting the local Nightkin population, blending medical mystery with political tension. Unraveling this hidden plot requires diplomatic nuance, thorough investigation, and careful exploration of the surrounding wilderness.
Initiating the Investigation in Jacobstown
To begin this critical assignment, you must travel to the mountain resort of Jacobstown located in the northwestern region of the Mojave Wasteland. Once inside the main lodge, seek out Doctor Henry, a former Enclave scientist who is actively researching a cure for Nightkin schizophrenia. He will express deep concern over a sudden spike in stealth boy dependency and ask for your assistance in tracking down the root cause. This initial conversation officially adds the objective to your logs and sets your investigation into motion.
Before venturing out, it is highly recommended to speak with Lily Bowen, a friendly Nightkin grandmother who can join your party as a companion. Having her along provides valuable combat support and unlocks unique narrative depth as you delve into the psychological struggles of her people. Her personal connection to the unfolding crisis makes the ensuing journey much more meaningful for players looking to experience the full lore of the region.
Exploring the Perilous Charleston Cave
The next phase of the mission directs your party toward Charleston Cave, a damp underground network located just a short distance north of the resort. This subterranean labyrinth is filled with aggressive nightstalkers that utilize natural stealth to ambush unsuspecting travelers navigating the dark tunnels. Moving carefully through these caverns demands a high level of situational awareness to avoid being overwhelmed by the venomous pack beasts. Your ultimate goal is to locate a deceased Nightkin researcher tucked deep within the heart of the cave system.
As you fight your way to the lowest chambers, you will discover the body surrounded by hostile creatures. Searching the remains reveals a chewed stealth boy, which serves as the crucial piece of evidence Doctor Henry requires to advance his scientific experiments. Securing this item is necessary to understand how a specific mutant strain of flora is altering the behavior of the local wildlife.
Resolving the Medical Dilemma and Nightkin Politics
Upon returning to Jacobstown with the recovered device, you must present your findings to Doctor Henry inside his laboratory. He will propose a high-stakes experiment utilizing Lily to test a potential cure, which immediately triggers a confrontation with Marcus and a hostile Nightkin faction leader named Keene. Navigating this tense diplomatic standoff requires careful dialogue choices to prevent a violent outbreak from tearing the peaceful community apart. Players who wish to optimize their standing should weigh the long-term consequences of their scientific decisions carefully.
If your speech skills are sufficiently high, you can convince Keene to stand down and allow the research to continue without further hostility. Alternatively, you can choose how to configure the experimental parameters to balance Lily's mental stability with the survival of her species. Completing these final choices successfully concludes the quest, rewarding your character with substantial experience points and shaping the future of the mutant sanctuary.

How To Dive In Hello Kitty Island Adventure...
Exploring the sun-drenched beaches in Hello Kitty Island Adventure is a delightful experience that becomes even more magical once you can explore beneath the ocean waves. The vast aquatic biomes surrounding the island hide valuable resources, hidden chests, and unique quest items that remain out of reach for beginners. Learning how to navigate the deep water effectively allows you to maximize your daily exploration rewards and progress smoothly through the game's main storyline.
Reaching the Required Friendship Milestones
Before you can begin your underwater journey, you must focus your efforts on building a strong relationship with Kuromi. She holds the key to unlocking the essential aquatic blueprint that grants access to the ocean depths. Handing her favorite spooky gifts daily is the most efficient strategy to raise your connection level quickly.
You will need to reach friendship level six with her to trigger the specific questline associated with deep-sea exploration. Paying close attention to her daily requests ensures that you do not delay this vital mechanical upgrade. Once this milestone is reached, she will gladly share the specialized crafting information you need to move forward.
Completing the Deep Dive Quest
Reaching the required friendship level automatically initiates a unique mission called the Deep Dive quest. Kuromi will guide you toward the local waters to test your stamina and teach you the fundamentals of staying submerged safely. Following her specific instructions carefully will help you understand how the mechanics shift when you leave the dry land.
During this introductory assignment, you will learn how to manage your breath meter while searching for objects hidden on the shallow sea floor. Successfully completing her tasks rewards you with the Snorkel blueprint, which is the foundational tool required for all future aquatic missions. This item opens up vast new areas of the map that were previously completely inaccessible to your character.
Gathering Materials and Crafting the Snorkel
With the blueprint safely in your inventory, you must head over to Chococat’s crafting table to assemble your new exploration equipment. The recipe requires a few common resources scattered across the island, which can be gathered manually in just a few minutes. You will need to collect rubber and sparks to complete the assembly process successfully.
Rubber can often be found resting beneath the shade of large trees, while sparks can be crafted using light stones found near the volcanic regions. Bringing these components together allows you to forge the functional gear instantly. Once the crafting process concludes, your character automatically gains the permanent ability to submerge in deep blue waters whenever you visit the coast.
Mastering Underwater Exploration and Mechanics
Diving itself is incredibly straightforward once the proper equipment is active on your character profile. When swimming in deep water, a new directional icon appears on the right side of your screen, allowing you to plunge beneath the surface manually. You can use the standard directional joystick to navigate around coral reefs and deep oceanic trenches smoothly.
While exploring the ocean floor, keep a close eye on your oxygen indicators to avoid rushing back to the surface unexpectedly. The seabed is packed with rare kelp, unique shells, and ancient cargo crates that provide excellent crafting components. Returning to the shore frequently to empty your bags ensures that you never miss out on these valuable aquatic treasures.

Phantom Ganon Ocarina of Time Boss Strategy and...
Stepping into the eerie corridors of the Forest Temple marks a major turning point for players navigating Link's adult timeline. This haunted sanctuary culminates in a legendary showdown against a spectral doppelganger designed to test your combat reflexes. Mastering the Phantom Ganon Ocarina of Time encounter requires a blend of keen observation and precise timing to overcome Ganondorf's magical deception.
The Lore Behind the Spectral Puppet
Before confronting the true King of Thieves, Link must face a ghostly creation forged in his enemy's malicious image. This spectral entity serves as a cruel guardian tasked with suppressing the awakening of Saria, the Forest Sage. Defeating this puppet shatters the dark curse gripping the Sacred Meadow and proves Link's readiness as the Hero of Time.
The narrative weight of this encounter highlights Ganondorf's immense power and willingness to mock his heroic adversary. Upon his defeat, the phantom is ruthlessly banished to the Gap Between Dimensions by his own creator for failing to stop a child. This chilling cinematic moment elevates the game's dramatic stakes and sets a mature tone for the remainder of the adult era.
Conquering the Painting Phase
The battle initiates inside a circular gallery surrounded by mysterious paintings that confuse the senses. The ghostly rider will gallop across these canvases, creating deceptive visual clones to disguise his true point of entry into the real world. Players must carefully distinguish the genuine phantom from the false illusion by observing the subtle coloration of the portal trail.
Equipping your Fairy Bow is essential during this initial segment as you track the moving rider across the walls. Releasing an arrow the exact moment the true horseman breaks through the painting's surface will temporarily stun the boss. Repeating this precise maneuver a few times will eventually force the entity to abandon his steed and take to the air.
Mastering the Magical Tennis Match
Once airborne, the ghostly specter relies entirely on devastating energy orbs to overwhelm your defenses from above. This phase introduces the iconic Dead Man's Volley mechanic, requiring you to play a tense game of tennis using your sword. Deflecting the projectile back and forth increases the velocity of the magical sphere until one side fails to react in time.
Timing your horizontal slashes perfectly ensures the reflected orb safely returns to strike the floating magician. Once the counterattack successfully grounds the phantom, you must quickly close the distance to deliver heavy melee damage. Maintaining a steady rhythmic focus during these volleys remains the ultimate strategy for securing total victory in the Forest Temple.

m4a4 vs m4a1-s Which CS Weapon Is Better...
Choosing the right rifle on the Counter-Strike defender side remains one of the most enduring debates among competitive players worldwide. The choice between the loud, high-capacity M4A4 and the silenced, highly accurate M4A1-S directly influences your defensive positioning and economy management throughout a match. Understanding how these two iconic firearms perform under pressure allows you to align your loadout choice with your personal mechanical strengths.
Analyzing Raw Firepower and Magazine Capacity
The primary advantage of selecting the M4A4 lies in its traditional thirty-round magazine and slightly faster rate of fire. This larger ammunition capacity makes it exceptionally reliable when defending active bombsite choke points against full execution strategies. Players who prefer holding close-range angles or spraying down multiple rushing targets simultaneously will find this rifle far more forgiving.
Conversely, the M4A1-S features a smaller twenty-round magazine but compensates with a lower purchase cost and more predictable recoil dynamics. The reduced price tag provides a significant economic safety net, allowing teams to purchase full armor and utility setups more frequently during tight matches. The smaller reserve means that every shot must be calculated carefully, making it less ideal for chaotic spamming through dense smoke screens.
The Tactical Benefits of Stealth and Recoil Control
The signature silencer of the M4A1-S introduces unique tactical advantages that can catch aggressive attackers completely off guard. Firing this weapon does not reveal your exact location markers on the enemy radar layout, allowing you to anchor defensive zones from hidden positions. Furthermore, the absence of tracer rounds means you can fire safely through thick smoke screens without instantly triggering lethal return fire from opponents.
On the other hand, managing the louder M4A4 requires advanced spray pattern mastery but rewards you with superior damage consistency over prolonged skirmishes. Its faster delivery system ensures that you can secure high-speed multi-kills when the opposition attempts to overwhelm your defensive lines. The increased reserve pool also allows for aggressive pre-firing tactics across common movement corridors without the constant fear of running out of bullets prematurely.
Matching Your Rifle Selection to Map Positions
Your preferred structural roles and localized map positioning should ultimately dictate which defensive rifle you equip before a match begins. Passive anchor players who prefer long-range engagements or sneaky positioning inside site corners will benefit immensely from the accuracy of the silenced variant. The tight grouping of the initial shots ensures maximum efficiency when holding distant sightlines on expansive competitive maps.
Aggressive rotators and forward defenders should lean toward the high-capacity model to handle volatile close-quarters engagements effectively. If you frequently find yourself battling multiple opponents in rapid succession, the extra ten rounds in the magazine become an invaluable lifeline. Evaluating your individual shooting rhythm and structural responsibilities ensures you pick the perfect tool for securing consistent defensive victories.

Oblivion vs Skyrim Map Size Compared Across Both...
The debate surrounding map sizes in open-world role-playing games has fascinated fans for decades, particularly when comparing entries within the same legendary franchise. The Elder Scrolls IV: Oblivion and The Elder Scrolls V: Skyrim both offer massive, immersive worlds that captured the hearts of millions of players worldwide. While both games feel incredibly vast during gameplay, analyzing their actual digital footprints reveals surprising differences in scale and design philosophy.
The Numerical Measurements of Cyrodiil and Skyrim
When examining the raw technical data, Cyrodiil in Oblivion covers a slightly larger physical area than the rugged province of Skyrim. Game data suggests that Oblivion's map spans roughly 41 square kilometers of playable virtual terrain. In contrast, Skyrim's mountainous landscape measures closer to 37 square kilometers of total landmass.
This technical disparity means that Oblivion technically holds the title for the larger overall land area between the two mainline games. However, raw numbers do not fully capture how players actually experience these two distinct open worlds. The layout of the land significantly impacts your journey across the empire.
Topography and Its Impact on Travel Distance
Skyrim feels much larger to many players due to its vertical design, featuring massive mountain ranges and steep cliffs that dictate your pathing. Navigating around obstacles like the Throat of the World forces players to take winding routes instead of traveling in a straight line. This verticality increases the actual time required to walk from one side of the province to the other.
Oblivion features a more rolling, open landscape with expansive forests and gentle fields wrapped around the centralized Imperial City. While there are mountainous borders, a large portion of Cyrodiil can be traversed directly on foot or horseback. This open layout allows players to maintain maximum travel efficiency across the map.
Dungeon Density and Point of Interest Distribution
Another major factor in how we perceive map size is the sheer density of content scattered across the environment. Skyrim packs over 300 unique points of interest, including sprawling ancient Nordic ruins, active mines, and hidden cavern systems. This high concentration of discoverable locations ensures that players rarely walk for long without encountering a distraction.
Oblivion contains around 200 locations, meaning its points of interest are spaced further apart across the countryside. The vast spaces between Ayleid ruins and fortresses give Cyrodiil a distinct feeling of isolation and grand scale. This intentional spacing emphasizes the natural wilderness of the capital province.
How Design Philosophy Shapes Player Perception
Ultimately, the comparison between these two iconic worlds highlights how developer intentions shape our digital experiences. Oblivion aimed to present a vast, classic medieval fantasy empire with grand distances between major settlements. Skyrim focused on delivering a dense, rugged wilderness where danger and discovery lurk around every rocky corner.
Whether you prefer the rolling green hills of Cyrodiil or the snow-capped peaks of the northern wilderness, both games maximize their available space masterfully. Understanding these differences helps retro gaming enthusiasts appreciate the evolution of open-world mechanics over time.

Final Fantasy V Pixel Remaster Walkthrough for Every...
The release of the Final Fantasy V Pixel Remaster has given RPG enthusiasts a perfect reason to revisit one of the most mechanically deep entries in the classic franchise. Featuring an upgraded job system and refined audio-visual presentation, this version requires players to carefully navigate several distinct worlds and intricate dungeons. Mastering the layout of each crucial region ensures your party remains well-leveled and properly equipped to face the rising darkness.
Navigating the World of Beginnings
Your journey begins in the World of Bartz, where a meteorite crash triggers a series of global catastrophes. Players must first navigate the Tycoon Meteorite and the Wind Shrine to awaken the elemental crystals and unlock the foundational job classes. It is highly recommended to balance your initial party setup with physical and magical roles to handle early boss mechanics effectively.
As you progress through this starting realm, finding hidden passages in places like Walse Castle and the Library of Ancients becomes essential for securing high-tier spells. Many valuable items are tucked behind secret walls that require the Thief find passages ability to locate easily. Clearing these early landmarks efficiently sets up a strong foundation for the challenges waiting in the parallel dimensions.
Conquering the Fractured Second Realm
Upon entering Galuf's home world, the difficulty spikes significantly as you encounter complex dungeons like the Barrier Tower and Exdeath's Castle. This region introduces demanding status effects and aggressive enemy groups that can easily overwhelm an unprepared party. Utilizing specialized classes like the Time Mage or Summoner can dramatically shift the tide of battle in your favor during these treacherous segments.
Exploration in this secondary world demands thorough backtracking to small villages such as Kelb and Moore to unlock powerful optional equipment. Keeping multiple save files is a wise strategy here, as certain dungeon layouts alter permanently after key narrative milestones are reached. Maximizing your job points in these areas ensures your characters acquire the necessary passive skills before the worlds merge.
Surviving the Hazards of the Merged World
The final phase of your grand adventure combines previous maps into a unified landmass filled with legendary challenges and high-level sealed weapons. To unlock the ultimate power-ups, players must brave the four specific tablets hidden deep within dangerous environmental hazards like the Sunken Tower of Walse and the Great Trench. Each location requires a flexible strategy because the bosses guarding these seals possess unique elemental immunities.
Before venturing into the final dimensional rift, completing the optional superbosses and exploring the deep oceans yields unmatched rewards. This definitive edition rewards thorough exploration, making a systematic approach to every single town and cave highly beneficial for completeness. With your optimal job combinations fully realized, your warriors will be ready to cleanse the void and restore peace to the universe.

All Pale Ore Locations Hollow Knight Complete Upgrade...
In the beautiful and melancholic world of Team Cherry's Hollow Knight, surviving the depths of Hallownest depends heavily on the strength of your primary weapon. Upgrading your nail increases your damage output and allows you to defeat the kingdom's toughest bosses with fewer strikes. To achieve the absolute highest upgrade tier, adventurers must track down six rare pieces of Pale Ore hidden across different corners of the map.
Rewards for Altruism and Exploration
The first few pieces of Pale Ore can be obtained by assisting the unique characters you encounter during your journey. One piece is held by the Grubfather in the Forgotten Crossroads, who rewards you after you successfully rescue thirty-one of his missing children scattered throughout the world. Another piece is locked behind a spiritual milestone, requiring you to collect three hundred essence points and speak to the Seer in the Resting Grounds.
Gathering these items requires patience as you slowly uncover the secrets of the underground world. You can naturally track your collection milestones while checking global gaming statistics on your personal Steam account to see how close you are to total completion. Balancing these passive character requests with active mapping ensures a steady flow of upgrade resources.
Delving Into Treacherous Environmental Peaks
Two distinct pieces of Pale Ore are hidden deep within dangerous geographical biomes that test your traversal skills. The first is located at the very peak of Hallownest's Crown, positioned high above the industrial tunnels of the Crystal Peak region. Reaching this freezing summit requires advanced movement abilities or incredibly precise platforming maneuvers to bypass the sheer cliffs.
The second environmental piece requires navigating down into the claustrophobic corridors of the Ancient Basin. Players must explore the far western edge of this desolate zone to locate the ore sitting quietly in a dangerous cavern. This area is heavily guarded by aggressive local wildlife and environmental hazards that require quick reflexes to overcome.
Confronting Deadly Bosses and Arena Trials
The final two upgrade materials are heavily guarded by dangerous combat encounters that require absolute martial mastery. One piece is located within the shadowy depths of Deepnest, hidden directly behind the secret lair of the terrifying mimic boss known as Nosk. Defeating this shifting creature requires memorizing its fast movement patterns and exploiting gaps in its erratic charging attacks.
Your ultimate combat test awaits in the northern edges of the Kingdom's Edge region at the famous Colosseum of Fools. Players must survive the grueling Trial of the Conqueror, which serves as the second major arena challenge on the board. Overcoming the multiple waves of elite warriors rewards you with the final piece needed to complete your ultimate nail upgrade.

Elden Ring Frame Rate Unsuitable for Online Play...
Elden Ring players frequently encounter a frustrating technical hurdle that disrupts their journey through the Lands Between. The notorious frame rate unsuitable for online play error immediately forces the game into offline mode, preventing cooperative sessions and player invasions. This issue typically triggers when the internal engine detects severe performance dips below the baseline required for stable multiplayer synchronization.
Understanding the Root Causes of the Sync Error
The core rendering engine ties its online multiplayer netcode closely to the visual performance of the client application. When your system encounters sudden rendering bottlenecks or unstable micro-stutters, the game updates slower than the multiplayer server demands. To prevent severe competitive advantages or game-breaking latency issues, the automated safety mechanism actively kicks the player back to single-player status.
Hardware limitations are not always the primary culprit behind these abrupt network disconnections. Poorly optimized graphics configurations, background application interference, and outdated hardware instructions frequently trigger the rendering threshold error on robust gaming computers. Pinpointing the exact bottleneck requires testing a combination of software configurations and driver updates.
Optimizing Graphics Settings and Shader Delivery
Adjusting the in-game graphic options is the most reliable first step to stabilize performance metrics during chaotic combat sequences. Lowering demanding attributes like volumetric lighting, complex shadow details, and global illumination drastically reduces the strain on your graphics processing unit. Players should also consider disabling ray tracing entirely, as this feature demands massive system overhead that can cause sudden dips.
Enabling a dedicated borderless windowed mode or lowering the native resolution can provide an immediate relief to struggling hardware configurations. Shader compilation stutters often settle down after exploring an area for a few minutes, allowing the game engine to render complex spell effects more smoothly. Keeping the client application focused avoids sudden resource allocation drops that confuse the server monitoring software.
System Level Adjustments and Driver Deployments
Ensuring that your operating system updates its display drivers regularly plays a critical role in minimizing sudden rendering micro-stutters. Graphic processing manufacturers frequently launch targeted optimization updates specifically designed to stabilize open-world rendering cycles. You can also access your graphics control panel to manually force maximum performance mode for the executable file.
Background processes like heavy web browsers, recording software, and heavy file downloads should be disabled before starting up your multiplayer adventure. Setting the system power plan to high performance prevents hardware throttling during intense boss encounters. These small adjustments provide a consistent flow of physical system resources directly to the primary application thread.
Alternative Tweaks for Persistent Technical Issues
Checking the integrity of the local game files through your library launcher often resolves hidden data corruption causing localized performance drops. Disabling third-party overlays from communication programs or digital storefronts removes unnecessary background rendering cycles. Some players have found success by adjusting the display refresh rate within the main operating system settings to match the engine limits.
If the connection failure continues to persist, clearing the temporary system shader cache can force a clean rendering cycle upon restarting. Verifying that your machine utilizes the dedicated graphics card rather than an integrated processor remains vital for laptop gamers. These comprehensive methods ensure a stable environment so you can enjoy uninterrupted multiplayer gameplay.

RE2 Medallion Codes 2nd Run All Solutions for...
Navigating the eerie corridors of the Raccoon City Police Department becomes significantly more challenging during your second playthrough. The iconic survival horror experience alters various item locations and puzzle answers to keep veteran players on their toes. Unlocking the secret passage beneath the Goddess Statue requires finding three specific emblems scattered across the dangerous facility.
The Crowned Monarch of the Main Hall
Your journey to escape the nightmare begins in the central hub where the massive Lion Statue rests on the upper balcony. Unlike the standard campaign, the solution to this initial barrier has been completely rearranged to surprise returning survivors. To claim the first crucial item, players must rotate the dials to align the Crown, the Torch, and the Flying Bird symbols. Inputting this specific sequence immediately releases the prize from its ancient stone casing.
Securing this artifact early provides a small sense of relief before venturing into the darker, zombie-infested wings of the station. Managing your limited inventory space efficiently while gathering these quest objects ensures you can carry vital ammunition and healing items. Returning to the main floor allows you to safely deposit the emblem into the base of the central monument.
Challenging the Mythological Beast
Progressing deeper into the eastern wing leads players toward the lounge area where the majestic Unicorn Statue awaits interaction. The hidden scrap of paper containing clues is heavily defaced during this alternate scenario, forcing players to deduce the symbols independently. The correct combination required to unlock this mechanism is the Twin Children, the Scales, and the Small Snake. Aligning these glyphs triggers the internal gears to release the second essential object.
Stepping into these tight corridors requires extreme caution due to unpredictable enemy placements and sudden ambush scenarios. Having the solutions memorized allows players to bypass prolonged exposure to dangerous environments and conserve valuable resources. Once the second emblem is safely in your possession, the path to the underground facility becomes much closer.
Unlocking the Bound Maiden Statue
The final and most intricate trial involves locating the highly secured Maiden Statue tucked away behind the West Storage Room bars. Reaching this area requires an electronic detonator to clear the structural debris blocking the wooden barricade. Once inside the gloomy alcove, players must carefully examine the heavily weathered dial to select the Ram, the Harp, and the Bird symbols. Due to the severe damage on the statue face, identifying the correct icons requires precise alignment.
Completing this final task triggers the final mechanism, allowing you to gather all three essential items needed for progression. Placing every collected medallion into the central hub pedestal grants immediate access to the secret underground facility below. Bypassing these puzzles quickly ensures you maintain a solid advantage against the terrors lurking ahead.

Elden Ring 3 Wise Beasts
Exploring the expansive world of Elden Ring often requires solving environmental puzzles that test your observational skills rather than just your combat prowess. Among the most recurring and famous conundrums found across the Lands Between are the riddles of the ghostly towers, which prompt players to seek three wise beasts. These magical barriers block entry to powerful sorgery items, making it essential for players to track down the hidden specters to proceed.
Understanding the Nature of the Wise Beasts
The cryptic message instructing players to find three wise beasts refers to translucent ghostly turtles scattered around specific mystical towers. These towers, known as Rises, include famous locations like Oridys's Rise, Testu's Rise, and Chelona's Rise. Interacting with the glowing book near the entrance activates the puzzle and makes the spectral creatures materialize in the surrounding environment.
Each turtle must be struck with a weapon, a spell, or a projectile to shatter its magical existence. Once all three creatures are defeated, the seal on the corresponding tower breaks instantly, allowing you to claim the treasure inside. Understanding their varied hiding habits is key to solving these riddles without unnecessary frustration.
Hiding Spots and Environmental Hazards
While some spectral turtles stand out in plain sight on grassy paths, others utilize the environment to remain exceptionally well hidden. Players will frequently find them resting inside bushes, floating high in mid-air above wind currents, or clinging directly to the sides of steep cliffs. In some advanced puzzles, you might even need to strike an invisible target shimmering lightly in a body of water.
Navigating these areas requires keen awareness as local enemies will often try to disrupt your search. It is highly recommended to clear out nearby threats before focusing entirely on scanning the landscape for the glowing blue phantoms. Patience and careful looking will prevent you from missing these cleverly placed creatures.
What to Do When Turtles Fail to Spawn
A common problem many adventurers encounter is the sudden disappearance or failure of the wise beasts to spawn properly in the world. This issue typically happens if your character passes through a loading screen or dies mid-puzzle after interacting with the pedestals. Fortunately, resetting the puzzle mechanics is an incredibly straightforward process for any player.
To fix this problem, simply return to the glowing book at the entrance of the tower and read the inscription once again. Re-reading the prompt refreshes the local instance and ensures the spectral entities appear back in their designated locations. Avoid fast traveling away from the zone until you have successfully found and broken all three targets.
The Rewards of Unlocking the Mystical Rises
Putting in the effort to find these hidden phantoms rewards players with highly valuable items that significantly enhance magical character builds. Most of these sealed locations contain Memory Stones, which permanently increase your available spell slots for sorceries and incantations. Other towers house advanced legendary spells that can turn the tide of difficult late-game boss fights.
These puzzles serve as an excellent reminder that thorough exploration is just as important as mastering real-time combat mechanics. Unlocking each hidden chamber provides a reliable power boost that helps you survive the harsh challenges waiting further along your journey.

Resident Evil 2 Safe Combinations And Every Safe...
Navigating the tense, shadow-drenched corridors of the Raccoon City Police Department requires careful resource management and a sharp eye for hidden details. Throughout Resident Evil 2, players encounter heavily reinforced safes that contain critical inventory upgrades and powerful weapon modifications. Unlocking these secure containers significantly increases your chances of surviving the aggressive mutant hordes roaming the facility.
The West Office Safe Location and Solution
The first major security container is located on the initial floor of the police station within the busy West Office room. To locate this dial safe, head to the small partitioned office space nestled in the southern corner of the room. Surviving players can open this lock by turning the dial left nine times, right fifteen times, and finally left seven times.
Successfully cracking this code rewards you with a highly coveted hip pouch to instantly expand your limited carrying capacity. For players choosing Leon, this secure container instead provides a valuable muzzle brake to increase the combat effectiveness of your standard handgun. Managing your resources properly early in the game ensures you have enough defensive tools for tougher battles ahead.
The Waiting Room Safe Combination
Moving upstairs to the eastern wing of the second floor brings players to the brightly lit Waiting Room area. A large iron safe rests directly behind the main welcome counter, requiring a completely different directional dial pattern to open. To clear this lock, you must carefully turn the wheel left six times, right two times, and left eleven times.
Opening this lock provides critical tactical components depending on which character scenario you are actively playing. Leon players will discover a high-capacity extended magazine for the Matilda handgun, while Claire finds a specialized frame part. Securing these items early alters your combat efficiency during unexpected encounters in the nearby hallways.
The Treatment Pool Room Sewer Safe
Deep within the subterranean sewer system, players will eventually discover a final hidden safe in the industrial Treatment Pool Room. This container is placed against the concrete wall right next to the heavy cable car platform link. The combination is scratched onto the side of a nearby piece of machinery, requiring a simple turn left two times, right twelve times, and left eight times.
Unlocking this final container provides essential firearm components that maximize your offensive power before entering the final laboratory zones. Leon receives a sturdy shotgun stock to reduce recoil, while Claire gets a reinforced mag loader for her specialized revolver. Taking the time to scour these dangerous zones ensures your character is fully prepared for the final boss encounters.

Cards Del Amor Challenge Round 2 Complete Guide
The Cards Del Amor Challenge Round 2 in Final Fantasy VII Rebirth tests a player's ability to maximize lane values through strategic card placement. Occurring as part of the Card Carnival mini-games in Costa del Sol, this puzzle requires careful positioning rather than aggressive lane pushing. Mastering this challenge unlocks essential progress toward coastal rewards and expands your card collection.
Understanding the Round 2 Puzzle Mechanics
Unlike standard Queen's Blood matches where players draw random cards, this puzzle provides a fixed hand with a predetermined board state. You receive three specific cards: Fat Chocobo, Posh Chocobo, and Chocobo & Moogle. Winning requires you to outscore the pre-set opponent total in the bottom lane by utilizing synergy bonuses effectively.
The key to solving this round lies in understanding how board positions affect card skills and lane multipliers. Each card in your hand enhances the values of adjacent spaces or scales based on surrounding unit placement. Placing your cards in the wrong order will fail to generate the minimum score needed to conquer the lane.
Step-by-Step Card Placement Solution
To begin the challenge, select the Fat Chocobo card and place it in the bottom-left position of the board. This foundational move establishes your presence in the bottom row while opening up adjacent power nodes. Establishing this anchor position is crucial for maximizing the effectiveness of your subsequent card drops.
Next, take the Posh Chocobo card and deploy it into the bottom-right space of the same row. Positioning this unit on the far right activates its individual power boosts while leaving the center space open for your final move. This arrangement creates the exact conditions needed to yield maximum total points in the final calculation.
Finalizing Victory with Synergy Calculations
Conclude the match by placing the Chocobo & Moogle card into the remaining empty space in the bottom-center position. Inserting this unit between your two previously placed cards triggers its synergy effect across the entire bottom lane. The resulting score jump pushes your total past the opponent's score, securing an immediate victory.
Successfully completing this puzzle rewards you with the Posh Chocobo card to add to your permanent Queen's Blood collection. Completing these side activities grants valuable companion points and progression items necessary for unlocking exclusive character beachwear. Taking the time to master each round ensures smooth progression through the Costa del Sol storyline.

Loki Summer Skin Guide for Marvel Rivals
The tactical arena shooter Marvel Rivals continues to captivate players with its expanding roster and seasonal events. Among the most anticipated additions is the new seasonal cosmetic for Asgard's God of Mischief. This guide covers everything you need to know about unlocking and showcasing the Loki Summer Skin during the latest festival.
Overview of the God of Mischief Summer Variant
The Loki Summer Skin introduces a vibrant aesthetic that stands out significantly from the strategist's default regal armor. NetEase Games designed this seasonal reward to celebrate the beach-themed festivities within the community. The visual overhaul transforms his illusions and duplicate clones into bright summer-themed representations on the battlefield.
Using this skin does not alter Loki's underlying abilities or competitive hitboxes, ensuring that gameplay remains entirely balanced. However, the custom particle effects provide a refreshing twist during chaotic team fights. Fans of the character will appreciate the unique voice lines and thematic animations included with the variant.
How to Unlock the Loki Summer Skin
Players can acquire this exclusive cosmetic by participating in the active Summer Festival limited-time event. The primary path requires completing a series of event-specific challenges to accumulate seasonal event currency. These tasks typically involve playing matches, securing elimination assists, or generating clones with Loki's unique ability kit.
Alternatively, the cosmetic can be claimed directly through the seasonal event pass tier rewards before the promotion concludes. Dedicated players should prioritize their daily quests to maximize experience point gains throughout the week. Tracking your milestone progress inside the main event hub ensures you do not miss out on the reward.
Strategies for Maximizing Event Tokens
To secure the skin efficiently, focusing on role-specific matchmaking queues can greatly accelerate your challenge completion speed. Playing alongside characters with strong synergies, such as Thor or Hela, allows Loki players to capitalize on team-up abilities more frequently. Winning consecutive matches in competitive modes also provides a steady bonus toward event progress markers.
It is highly recommended to log in regularly to check for refreshed weekly milestones that offer larger token payouts. Coordinating with a premade group can significantly reduce the time needed to finish complex squad objectives. Saving your gathered currency specifically for this high-tier reward will ensure you unlock it before the festival timer runs out.

FXAA Vs TAA Vs SMAA Which Anti Aliasing...
Choosing the right graphic settings can dramatically transform your gaming experience, especially when it comes to eliminating jagged edges on digital displays. Anti-aliasing serves as the primary tool to smooth out these sharp pixel lines, but selecting the right method requires balancing visual clarity against hardware performance. This guide compares three dominant post-processing techniques to help you determine the optimal configuration for your personal gaming setup.
The Performance Priority of FXAA
Fast Approximate Anti-Aliasing functions as a screen-space technique that applies a quick blur filter directly over the completed image frames. Because it requires very little mathematical calculation, it introduces virtually zero performance cost on modern graphics cards. This makes it an incredibly reliable option for budget hardware setups or competitive games where maximizing frames per second is vital.
However, this speed comes with a noticeable visual drawback that many players find distracting during active gameplay. The blanket filter frequently introduces a prominent softness across the entire screen, reducing the crispness of fine text and distant textures. If you prioritize sharp image quality over raw performance, you will likely notice the loss of environmental detail in modern titles.
The Balanced Clarity of SMAA
Enhanced Subpixel Morphological Anti-Aliasing improves upon older techniques by analyzing the geometric shapes and contrast variations within a scene before drawing pixels. This specialized algorithm detects actual edges much more accurately, allowing it to apply targeted smoothing without muddying the entire display. The result is a remarkably sharp presentation that retains fine texture details while keeping the performance impact relatively minimal.
Many hardware enthusiasts consider this option the absolute sweet spot for mid-range gaming systems because it handles static objects beautifully. It eliminates prominent shimmering along straight borders without demanding the heavy processing power required by traditional multi-sampling methods. For title-specific discussion, finding the ideal balance often leads players directly to this configuration for older or stylized releases.
The Temporal Stability of TAA
Temporal Anti-Aliasing takes an entirely different engineering approach by utilizing data from previous frames to clean up the current image. This continuous timeline tracking makes it exceptionally effective at removing temporal shimmering, which usually occurs when objects or camera angles move rapidly across the screen. It has rapidly become the industry standard for modern game engines that rely on advanced global illumination and complex shader effects.
The downside to this frame-blending process is a distinct ghosting or smearing effect that can surface during fast-paced action sequences. When the camera pans quickly, the historic visual data can leave behind faint trails or reduce the clarity of moving targets. Despite this artifact, its ability to stabilize flickering geometry makes it indispensable for highly detailed open-world environments.
Determining the Best Method for Your Needs
The definitive answer to which method reigns supreme depends heavily on your hardware capabilities and personal visual preferences. Competitive players using high-refresh monitors should favor faster solutions to avoid input latency and ensure maximum smoothness during intense firefights. Meanwhile, players exploring cinematic stories on high-resolution displays will benefit immensely from the comprehensive stability offered by temporal tracking.
Experimenting with individual menu adjustments remains the most effective way to find a customized setup that satisfies your eyes. Balancing pixel sharpness against temporal stability allows you to maximize immersion without compromising your frame rate consistency. Understanding how these distinct algorithms manipulate your screen ensure you can configure any modern graphical interface with complete confidence.
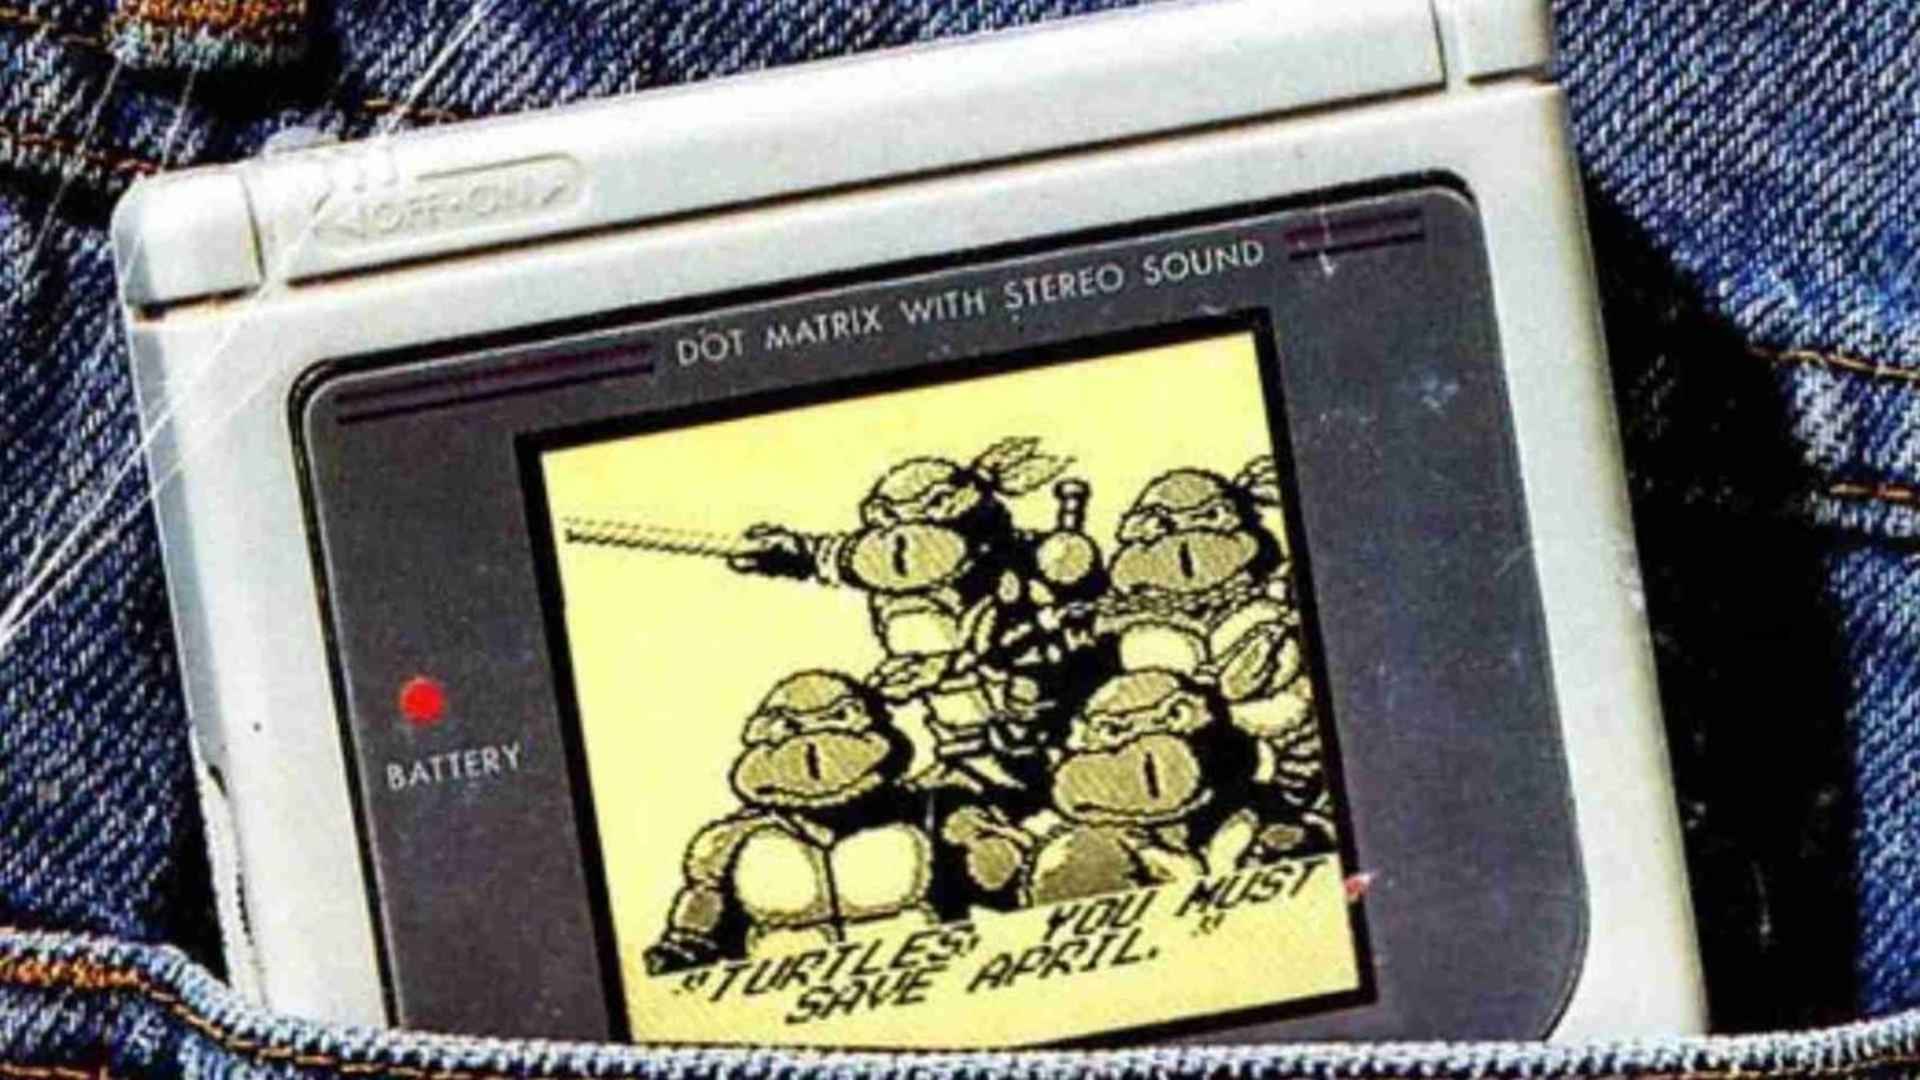
Movies Similar To Lord Of The Rings Worth...
Peter Jackson's monumental adaptation of J.R.R. Tolkien's Middle-earth set a towering standard for modern high fantasy cinema that remains largely unmatched. Finding films that replicate its seamless blend of profound lore, sweeping landscapes, and deeply earnest character bonds can be a challenging quest for dedicated cinephiles. Fortunately, several remarkable cinematic adventures capture that same sense of grand scale and emotional resonance for viewers seeking their next epic journey.
Journeying Through the Magical Portals of Narnia
For audiences yearning for meticulously constructed worlds balanced by ancient prophecy, the silver screen translations of C.S. Lewis's classic novels provide a perfect transition. These stories follow young protagonists thrust into a mystical realm balancing deep lore, epic battlefield confrontations, and memorable mythical companions. The intricate production design and soaring orchestral tracks successfully evoke a familiar sense of cinematic wonderment.
Furthermore, these adaptations excel at presenting the eternal struggle against oppressive dark forces without losing their core emotional sincerity. The narrative framework heavily emphasizes themes of sibling unity, personal courage, and spiritual resilience in the face of absolute despair. It remains an essential destination for fans who appreciate world-building that values traditional folklore and earnest heroic arcs.
Exploring the Roots of High Fantasy Traditions
Stepping back into the golden era of eighth-decade filmmaking reveals foundational treasures that directly paved the way for modern fantasy blockbusters. The iconic collaboration between George Lucas and director Ron Howard created a rich universe filled with unlikely heroes, hidden royalties, and menacing sorcery. This enduring production captures the specific charm of a dangerous countryside journey undertaken by small individuals carrying massive global responsibilities.
The creative reliance on practical special effects, detailed prosthetics, and grand outdoor environments grants the scenery a tangible depth that rivals Middle-earth. Its balancing act between lighthearted camaraderie and genuinely dark stakes keeps the pacing engaging throughout the entire running time. Exploring this historical landmark offers invaluable perspective on how the cinematic language of grand quests evolved over the generations.
Embracing the Depth of Arthurian Mythos
Viewers who find themselves drawn to the noble knighthood, ancient swords, and tragic historical elements of Gondor will discover immense satisfaction in legendary retellings of British folklore. Certain sweeping cinematic productions focus on the dramatic rise and fall of utopian kingdoms, driven by haunting visual poetry and grounded martial combat. These narratives explore the psychological weight of destiny and the heavy burdens carried by leaders caught in changing historical eras.
The atmospheric presentation relies on brooding landscapes, intricate medieval costuming, and grand philosophical conflicts regarding honor and corruption. Rather than relying solely on continuous magical spectacles, these stories draw their strength from intense character dynamics and political intrigue. It provides a more mature, contemplative alternative that still honors the core traditions of epic storytelling.
Navigating the Wonders of Animation
Epic scope is not strictly confined to live-action sets, as illustrated by magnificent hand-drawn masterpieces that explore ecological conflicts and ancient gods. Certain legendary international animation studios craft sprawling narratives centered on young warriors caught between industrial progress and divine forces. These beautifully illustrated journeys feature massive creature designs, ancient spiritual lore, and breathtaking environmental backdrops that rival any physical landscape.
The masterful storytelling refuses to rely on simple moral binaries, offering complex antagonists and deeply philosophical resolutions instead. The lingering focus on quiet atmospheric intervals mixed with sudden, impactful action sequences mirrors the emotional pacing of the finest fantasy literature. Delving into these animated realms expands the definition of what constitutes a truly grand adventure worth experiencing on the screen.

Where Is Mickeys Secret Door Dreamlight Valley Location...
Unlocking the many secrets scattered across the magical biomes of Disney Dreamlight Valley requires patience, exploration, and a keen eye for hidden quest items. One of the most intriguing early mysteries involves helping Mickey Mouse locate a hidden entrance that leads to a room filled with valuable treasures. Navigating this questline effectively ensures you do not miss out on rare rewards and essential progression items.
Triggering the Secret Door Quest
Before you can locate the hidden portal, you must raise your friendship level with Mickey Mouse to level ten. Reaching this milestone unlocks the final quest, which prompts the iconic character to hand you a mysterious magical memory. This memory displays a distinct image of a hidden door concealed behind a conspicuous purple curtain.
Once the memory is active, you must speak with Mickey to initiate the formal search within the village bounds. He will explain that the door exists somewhere close by but has been masked by ancient magic. Preparing your inventory with a few empty slots is highly recommended before heading out to investigate the area.
Finding the Hidden Location
The magical memory provides a massive clue by showing the layout of the Dream Castle, which serves as the central hub for exploring different realms. You will need to enter the Dream Castle and head toward the right side of the main staircase on the ground floor. Tucked behind some decorative potted plants, you will easily spot the purple curtain matching the vision.
Interacting with the curtain reveals a solid stone wall containing four distinct, empty slots that require specific items to open. This structural barrier confirms you have found the correct spot, shifting your objective toward solving the matching gemstone puzzle. You can read more about game updates and strategies to keep your village running smoothly.
Solving the Gemstone Puzzle
To bypass the stone wall, you must gather four unique gems from various mining nodes across the valley's distinct biomes. The door requires an Aquamarine from the Dazzle Beach or Forest of Valor, a Garnet from the Plaza or Peaceful Meadow, a Tourmaline from the Sunlit Plateau or Frosted Heights, and a Citrine from the Sunlit Plateau or Glade of Trust. Standard versions of these gems will work perfectly, meaning you do not need to spend time hunting for shiny variations.
Once you have harvested all four materials, return to the Dream Castle and place them directly into the corresponding slots on the wall. The stones will glow brightly, triggering a short animation that causes the stone barrier to slide away completely. This action permanently grants you access to Mickey's hidden room, allowing you to complete the primary quest objective.
Gathering Your Rewards
Stepping inside the secret room reveals several chests filled with valuable crafting materials, rare seeds, and unique decorative items. You will also discover a hidden storage book on the floor, which can be placed back onto the nearby bookshelf to unlock an extra hidden chest. Taking the time to search every corner ensures you maximize the loot generated by this lengthy friendship storyline.

Is Sniper Elite 4 Cross Platform And How...
Rebellion Developments captured the hearts of tactical shooter fans when they released their critically acclaimed World War II sniping adventure set in beautiful Italy. As new players continue to discover the massive tactical maps, many wonder if they can team up with friends across different gaming systems. Understanding these specific connectivity limitations and network features is essential before organizing your next online deployment with your squad.
The Reality of Cross Platform Compatibility
Many modern tactical gaming communities expect crossplay functionality as a standard feature in modern cooperative and competitive shooter titles. Unfortunately, Sniper Elite 4 does not support cross platform matchmaking between entirely distinct console families and computer hardware networks. Players on PlayStation 4, Xbox One, Nintendo Switch, and PC are strictly restricted to playing within their own hardware ecosystems.
This distinct separation ensures that multiplayer matchmaking pools remain inherently fair and technically stable across all available versions. While this limitation might disappoint groups of friends who own different machines, it guarantees that everyone in a match utilizes similar input devices. Consequently, you must ensure that your cooperative gameplay partners are using the exact same gaming hardware ecosystem.
How the Cooperative Campaign Operates
Despite the absolute lack of crossplay features, this popular title offers an incredibly robust online multiplayer suite for players on the same network. The absolute standout feature is the dedicated cooperative campaign mode, which allows two players to experience the entire narrative journey together. Operating as a sniper duo opens up unique tactical possibilities, such as one player spotting targets while the other executes the long-range shot.
In addition to the main story missions, players can test their tactical endurance in the intense Overwatch and multiplayer Survival modes. Overwatch assigns completely distinct roles to each participant, forcing one player to act as a grounded operative while the other provides cover as a high-altitude sniper. Meanwhile, the standard Survival mode increases the pressure by forcing up to four allies to withstand increasingly difficult waves of enemy infantry forces.
Competitive Matchmaking Modes and Mechanics
For individuals who prefer testing their competitive marksman skills against real human opponents, the online player-versus-player modes offer highly diverse battlefield scenarios. These adversarial match types support up to twelve active players in a single session, depending heavily on the specific platform performance and map size. The standard gameplay dynamic shifts completely from traditional fast-paced action to a slow, calculated experience centered on stealth and environmental camouflage.
Unique game variants like Distance King reward players based entirely on the total physical distance of their successful shots rather than raw kill counts. This specific design philosophy encourages authentic military sniping tactics, highly rewarding those who master complex wind deflection and bullet drop mechanics. Successfully navigating these competitive arenas requires immense patience, sharp situational awareness, and an excellent understanding of hidden vantage points.
Setting Up Multiplayer Lobbies Smoothly
Initiating an online session within your specific platform ecosystem is a straightforward process handled directly through the main options menu. Players can easily host private servers to customize their preferred environmental settings, ammunition limits, and tactical difficulty parameters for their friends. Utilizing these custom lobbies allows gaming groups to practice their coordinated team shots without the interruption of random online matchmaking participants.
If you encounter any sudden connectivity issues while attempting to join a friend's active lobby, verifying your network configuration is highly recommended. Ensuring that your platform system software is fully updated to the latest version will also prevent accidental matchmaking drops or lobby errors. Maintaining a stable internet connection will ultimately allow you to enjoy uninterrupted tactical operations across every beautiful Mediterranean map.

Lego Harry Potter Years 1 4 Characters Complete...
Exploring the massive digital version of Hogwarts in Lego Harry Potter Years 1 to 4 provides players with an incredibly vast roster of magical personalities to unlock. Gathering every single wizard, witch, and creature requires a deep understanding of where these characters are hidden throughout the main levels and the open hub areas. Successfully completing your collection roster is essential for accessing secret zones that are otherwise blocked during your initial playthrough.
The Core Golden Trio and Hogwarts Students
Unlocking the primary student roster forms the foundational baseline of your journey through the early school years. Main protagonists like Harry, Ron, and Hermione receive numerous variant outfits that reflect their progression across different movies. Each version of these students possesses unique traits, such as Hermione utilizing her specialized library book to solve unique magical runes.
Beyond the core group, collecting members from other houses like Slytherin and Hufflepuff is vital for solving environmental riddles. Certain locked doors throughout the corridors require a student from a specific house to wave at portraits to gain entry. Prioritizing these student tokens early in your exploration ensures you have the correct magical alignment for any hub area puzzle.
Mastering Specialized Character Magic Abilities
Reaching ultimate completion status requires utilizing the unique traits possessed by specialized non-human entities and dark wizards. For instance, goblin characters like Griphook are the only individuals capable of unlocking the metallic vaults scattered across Gringotts and Hogwarts. Without these specific figures in your selection grid, acquiring several high-value red bricks becomes entirely impossible.
Similarly, strong characters like Hagrid are required to pull heavy orange chains that block access to hidden subterranean chambers. You will also need to unlock dark magic practitioners like Tom Riddle or Voldemort to manipulate the glowing red pieces found in later stages. Balancing your active character choice during free play sessions is the fastest way to systematically clear out every stubborn blockade.
Navigating the Hub Areas and Diagon Alley Shops
Many of the most elusive character tokens are not hidden inside standard story missions but are scattered across the vast hub environments. The Leaky Cauldron acts as your main transitional space where you can monitor your total collection progress and review your current unlocks. Exploring the surrounding shops reveals hidden puzzles that award rare tokens upon completion.
Visiting the Wiseacre Wizarding Equipment shop allows you to input specialized passwords to speed up your recruitment process if you prefer a shortcut. Additionally, the basement area contains custom builders where you can assemble personalized magical avatars to use in various free play zones. Exploring every corner of the hub environment ensures no hidden token is left behind in the dark.
Final Strategy for Complete Roster Completion
Achieving a perfect collection status demands that you revisit completed story acts using the versatile Free Play mode. This setup automatically populates your selection wheel with a balanced group of characters that cover every possible mechanical requirement. By systematically checking the status indicators on the world map, you can pinpoint exactly which areas still hold remaining secrets.
Investing your collected studs into purchasing the character detector extra from the shop will drastically reduce your overall searching time. This toggleable assist feature places helpful glowing arrows on the screen that point directly toward nearby hidden tokens. With patience and the right team layout, you will easily complete your ultimate magical collection.

Divinity Original Sin 2 Thrice Bound Chest Puzzle...
Navigating the rich fantasy world of Divinity Original Sin 2 often introduces players to complex environmental puzzles that require deep tactical thinking. Among these hidden challenges, the enigmatic chest bound by three distinct locks stands out as a unique test of resourcefulness and patience. Unlocking this container rewards dedicated adventurers with high-tier loot essential for surviving the difficult combat encounters ahead.
Understanding the Nature of the Three Seals
Before attempting to break open the container, players must analyze the magical signatures guarding its valuable contents. The chest is reinforced by ancient elements that resist traditional lockpicking tools or brute force attacks. Players who attempt to smash the object will quickly realize that conventional physical weapons yield no results against its mystical armor.
To bypass these safeguards, your party needs to identify specific triggers hidden in the surrounding environment. Observing the graphical runes etched onto the lid provides clues about which elements are required to open it. Balancing your team composition ensures that you have the right magical abilities active when interacting with the object.
Gathering the Required Elements and Skills
Overcoming this obstacle successfully requires a balanced combination of exploration and character skill utilization. You will need to locate hidden interactive objects in the nearby area to weaken the primary magical bonds. In many instances, talking to local spirits using the Pet Pal perk provides valuable context clues regarding the history of the seals.
Additionally, having a character with high lore skills allows your party to examine the object directly for structural weaknesses. If your current squad lacks the necessary elemental spells, you can search for specialized scrolls scattered throughout the map. Preparing these resources beforehand saves a significant amount of time and prevents unnecessary backtracking through dangerous territory.
Executing the Precise Unlocking Sequence
Once you have gathered the essential tools, you must interact with the environmental mechanisms in a specific chronological order. Activating the incorrect trigger can reset your progress or detonate protective traps that inflict severe elemental damage on your party members. It is highly recommended to separate your characters to position them strategically near each individual mechanism.
After disabling the secondary nodes, return to the main container to apply the final counter-spell. Success is indicated by a unique audio cue and a change in the physical appearance of the container. Once the arcane barriers fade entirely, your party can safely plunder the gold and rare equipment waiting inside.

Life Is Strange Episode 3 Photos Complete Photo...
Navigating the emotional twists of Life Is Strange Episode 3 requires players to balance intense narrative choices with careful environmental exploration. Finding all ten optional photo collectibles scattered throughout the chapter allows players to unlock unique achievements and complete Max Caulfield's journal entries. This complete location guide provides step-by-step directions to ensure you do not miss a single snapshot during your journey through Chaos Theory.
Tracking Down Early Snapshots in Blackwell Academy
The first collectible opportunity arises shortly after Max sneaks into the girls' dormitory at night. Walk into Victoria Chase's room and approach the glowing action prompt near her desk to adjust her action figure setup before taking the picture. Taking this photo unlocks the Parallax achievement and kicks off your completionist run for this episode.
A bit later, you will find yourself exploring the dark hallways of the main school building alongside Chloe. Before entering the principal's office, head toward the science classroom located down the opposite corridor. Inside the room, walk over to the glowing fish tank, turn the light on, and take a picture of the illuminated aquatic life.
The third photo is also hidden within the science lab, requiring you to interact with a skeletal model. Approach the cigarette-smoking skeleton standing in the corner of the room to trigger the optional photo action prompt. Documenting this bizarre decoration ensures you stay on track for unlocking the local optical achievements.
Exploring the Nocturnal Swimming Pool and Diner Area
Once you gain access to the school's indoor swimming pool area, do not rush into the water immediately. Instead, head toward the back corner of the locker room showers to find a distinct message written on a foggy window pane. Interacting with this circular glass surface will prompt Max to capture a beautifully atmospheric photograph.
After the dramatic nighttime events conclude, the next morning starts near the Two Whales Diner area. Walk around the side of the building toward the fenced alleyway where a massive truck is parked. Approach the driver side of the vehicle and ask the truck driver for permission to photograph his pristine machine.
If you wander closer to the diner's side entrance, you will notice a pile of discarded trash attracting local wildlife. Approach the dead birds surrounded by swarming ants carefully to avoid scaring off the surrounding context. Activating your camera here provides a gritty snapshot that fits perfectly into Max's artistic portfolio.
Unlocking Hidden Memories in Chloe's House and the Past
The narrative eventually shifts back to Chloe's home, offering a few final photo opportunities in the present timeline. Walk into the living room and check out the open window located near the dining table area. You will spot a bird resting outside on the sill that must be photographed before it flies away into the yard.
Afterward, head upstairs to the bedroom where Chloe is sitting at her desk working on her laptop. Stand directly behind her chair and wait for the precise perspective framing prompt to appear on your screen. This candid shot captures an intimate moment of friendship that reflects the core emotional themes of the entire series.
The final photo collectible is found during the emotional flashback sequence where Max travels back to her childhood. Walk into the kitchen area and locate the old vintage camera sitting on the counter near the sink. Pick up the device and use it to snap a picture of Chloe and her father cooking breakfast together.

Palworld Best Breeding Base Location Top Places To...
Establishing an optimized breeding hub in Palworld requires careful consideration of terrain geometry and spatial layouts. Unlike general resource outposts, a specialized breeding center demands extensive flat ground to prevent large creature models from glitching into surrounding obstacles. By choosing the right geographic coordinates, players can significantly accelerate their path toward perfect passive traits and ultimate base efficiency.
Prioritizing Flat Terrains to Combat Pathing Glitches
The primary hurdle in advanced monster propagation is the pathing artificial intelligence, which frequently struggles with verticality. When creatures get stuck on cliffs or rocks, their productivity drops immediately and can lead to starvation or stress diseases. Selecting completely horizontal plateaus guarantees that your assigned workers maintain an uninterrupted workflow around the ranches.
Wide open areas also allow you to place multiple breeding farms adjacent to each other without restricting movement corridors. This layout makes it much easier to manage food distribution boxes and egg incubators simultaneously. Minimizing natural obstructions is the single most effective way to streamline large-scale operations.
Top Strategic Coordinates for Undisturbed Breeding
Several locations across the map stand out as premium real estate for building a dedicated optimization sanctuary. The wide plains located near the initial starting regions offer vast stretches of unobstructed land that are perfect for early setups. These zones generally feature low-level threats, meaning your working companions will rarely be distracted by aggressive wildlife invasions.
For late-game players, the isolated islands situated on the northern edges of the world map provide natural defensive barriers against raiding parties. These remote territories give you total freedom to design elaborate industrial complexes without constant territorial interference. Utilizing these peaceful biomes ensures your focus remains entirely on balancing worker passives.
Optimizing Internal Infrastructure for Maximum Yields
Building a successful hub goes beyond selecting the perfect geographic region; it requires a highly organized internal blueprint. Crafting stations, storage chests, and specialized beds should be placed away from the main ranching facilities to prevent overcrowding. Keeping the paths clear allows logistics workers to transport eggs quickly without routing errors.
Additionally, keeping a self-sustaining agricultural sector inside the same perimeter ensures a steady supply of baking ingredients. Dedicated berry patches and wheat plantations eliminate the need to constantly teleport resources from secondary mining outposts. Centralizing your food chain keeps your operational efficiency high over long breeding cycles.

Metro Last Light Good Ending Requirements Explained
Metro Last Light offers players a gripping journey through the post-apocalyptic ruins of Moscow, where every choice can dictate the ultimate fate of humanity. Achieving the canonical good ending, known as the Redemption conclusion, requires navigating a hidden moral point system that evaluates Artyom's capacity for empathy. Unlike traditional games that feature explicit choices, this shooter subtly tracks your behavior across exploration, combat, and social interactions.
Understanding the Hidden Moral Point System
The path to redemption is paved by earning positive moral points while minimizing negative actions throughout the narrative. Flashpoints on the screen signify when a moral point is gained, often accompanied by a distinct whispering sound effect. To secure the optimal outcome, players must actively seek out these hidden opportunities to showcase true compassion.
Conversely, committing senseless acts of violence or ignoring characters in distress will drain your unseen standing. Balancing your decisions requires absolute patience and a deep willingness to engage with the surrounding world rather than rushing forward. It is vital to pay close attention to environmental cues that indicate potential moral growth.
Emphasizing Exploration and Environmental Awareness
Thoroughly exploring the claustrophobic tunnels of the metro network yields a significant portion of the required positive points. Stumbling upon hidden stashes, radio stations, and remnants of past human lives rewards players for their curiosity. These brief moments of reflection reinforce Artyom's connection to the world he is fighting to preserve.
Listening to full conversations between non-playable characters across various stations also contributes to your moral pool. Many citizens share harrowing stories that reveal the true depth of the societal collapse beneath Moscow. Taking the time to absorb these narrative details provides excellent context and unlocks essential points naturally.
Mastering Non Lethal Combat Strategies
Combat engagement heavily influences your alignment, making non-lethal subdual techniques the preferred approach against human adversaries. Knocking out soldiers instead of killing them demonstrates a profound respect for human life amidst chaotic faction wars. This restraint proves to the watching Dark One child that humanity is worth saving.
Surrendering enemies must always be spared, as executing defenseless opponents will immediately trigger heavy moral penalties. Utilizing stealth to sneak past entire enemy camps without raising alarms is often the safest method. Prioritizing pacifism during these tense encounters ensures your moral status remains pristine.
Executing Key Narrative Decisions
Specific major milestones in the story directly dictate the final outcome based on your mercy. Sparing high-profile targets when given the choice serves as a major indicator of your character growth. These critical turning points carry immense narrative weight and heavily sway the final sequence.
Additionally, performing small acts of kindness, such as returning a lost toy to a crying child, reinforces your virtuous path. Generously sharing military-grade ammunition with the less fortunate across various market sectors also boosts your alignment. Every compassionate action accumulates to secure the survival of Artyom and his companions.

Yakuza Like A Dragon Substories Guide
Yakuza Like a Dragon completely transformed the long-running Sega franchise by introducing a deep turn-based job system and a brand-new cast of characters. While the main story provides an emotional narrative, the optional side quests known as substories offer the quirky charm that fans have come to love. Navigating these unique encounters effectively will significantly enhance your journey through the bustling streets of Yokohama.
Understanding the Importance of Optional Content
Substories are essential for players who want to experience everything the game has to offer outside of the main campaign. These side missions grant unique rewards, including rare equipment, substantial amounts of money, and powerful Poundmates summons. Engaging with these characters also provides a welcome break from the intense narrative themes of the primary plotline.
Furthermore, completing these tasks frequently feeds directly into the game's core progression systems. Many encounters reward Ichiban Kasuga with substantial boosts to his personality traits, which are required to unlock advanced job classes later. Neglecting these stories means missing out on vital components that make late-game combat much easier to handle.
How to Locate and Unlock Side Quests
Finding new quests is relatively straightforward thanks to the convenient visual markers placed directly on your map screen. Most active missions appear as white exclamation points, which change to blue once you initiate the proper conversation. However, certain events are locked behind specific chapters of the main story or require a high bond level with your current party members.
Time of day also plays a crucial role in triggering specific events throughout the different districts. Some characters will only appear during the nighttime hours, while others require you to visit them during broad daylight. Checking your map regularly after major story milestones ensures that you do not miss out on time-sensitive opportunities.
Maximizing Your Personality and Character Progression
Every decision you make during these optional dialogues can impact how Ichiban grows as a leader. Choosing specific conversation options grants immediate bonuses to traits like Kindness, Passion, Style, or Charisma. Balancing these attributes is key to recruiting powerful allies and accessing restricted areas in the city.
Many of these missions culminate in challenging battles that test your tactical knowledge of the turn-based system. Successfully overcoming these bizarre enemies unlocks exclusive business management employees who can help you build your financial empire. Taking the time to finish every story transforms your ragtag group into an unstoppable force.
Essential Tips for Completing Difficult Challenges
Some late-game quests feature sudden spikes in difficulty that can catch unprepared players completely off guard. It is always wise to keep a healthy supply of healing items in your inventory before approaching an active quest marker. Ensuring your party members have updated gear will protect you from unexpected wipeouts during sudden boss encounters.
If you find yourself stuck on a specific objective, try advancing the main plot by one or two chapters. Returning to the area later with a higher overall character level and better job skills usually resolves the issue quickly. Patience and thorough exploration remain your best tools for conquering every hidden mystery in the game.